
Besides the numerous onboard recording options and codecs the Sony FS7 provides such as XAVC (up to 4K at 60p), MPEG2 422(HD) and the recently added ProRes HQ & 422 (HD), the camera is also capable of outputting 4K DCI (up to 60p) and 2K (up to 240p) Raw video feed that can be captured on an external recorder for the highest possible image quality when required.
However, the DNG Raw files recorded by the Odyssey 7Q from the FS7 may introduce a magenta cast and other undesirable colorimetry artefacts when imported in DaVinci Resolve. Furthermore, the material recorded using the RAW to ProRes functionality of the 7Q does not conform exactly to the S-Log3 tone-curve or either of the S-Gamut3 color spaces.
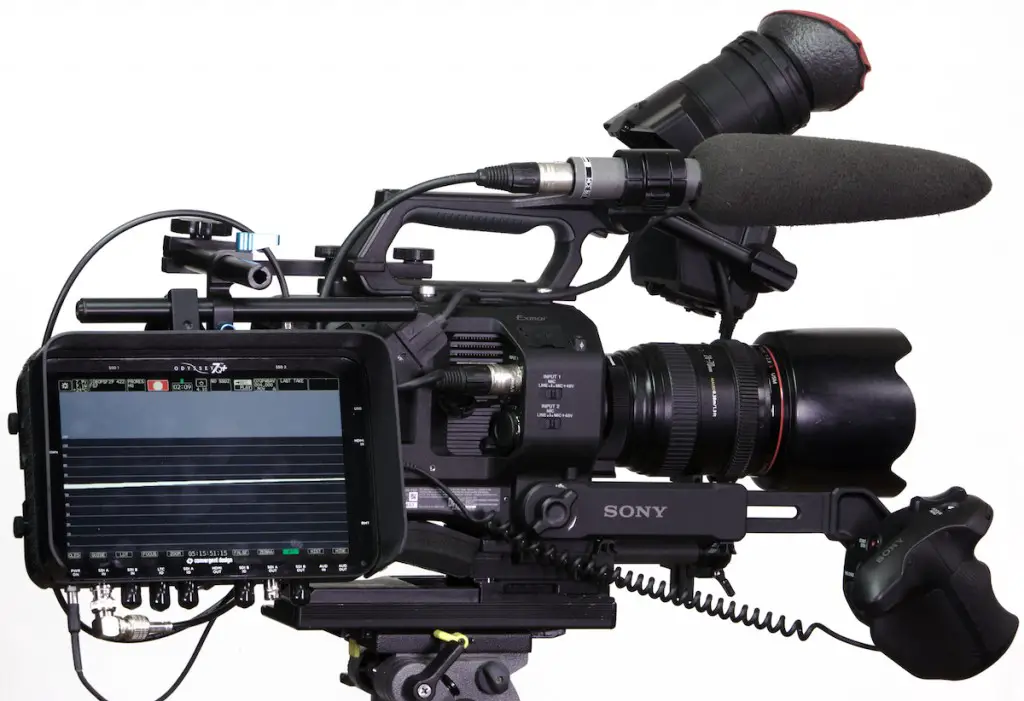
Image credit: DVinfo.net
That’s why Convergent Design provide a guide that explains how to compensate for this in Resolve matching the material to FS7 internal S-Log3 recordings in S-Gamut3.Cine color space. In addition, it also demonstrates how to apply a new LUT to convert S-Log3 to an image suitable for viewing on a Rec.709 monitor.
The LUTs provided for this workflow were created specifically for the FS7 footage, and they are not suitable for media from the FS700 or any other camera.
- Before you start, you should download the LUTs here.
- Then, launch DaVinci Resolve and click on the Settings button.
- Navigate to the Lookup Tables page and click the Open LUT Folder button in the middle of the window.
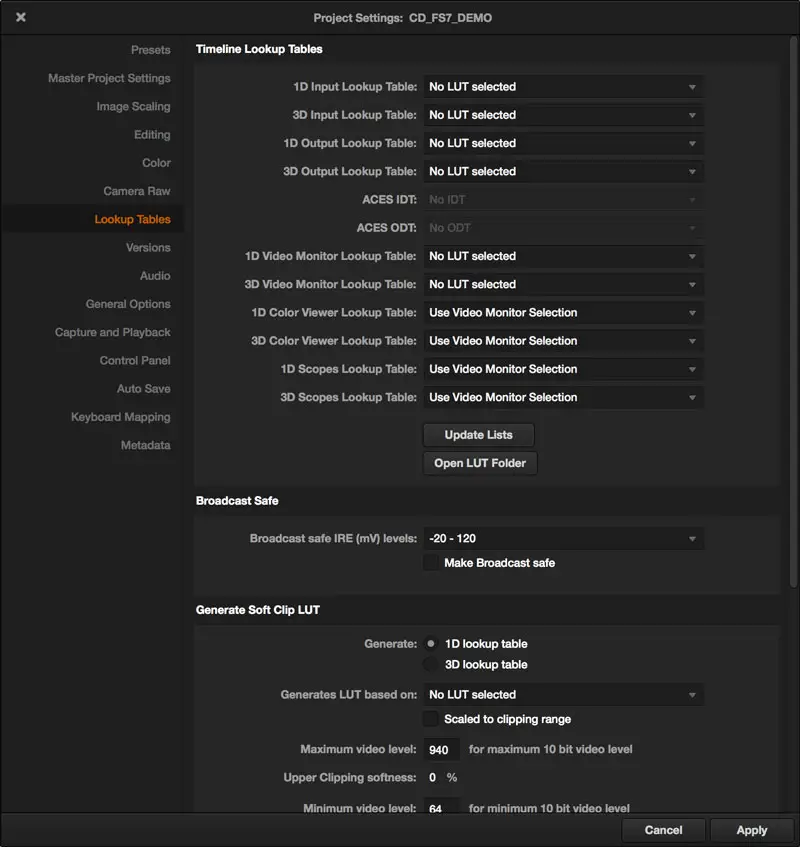
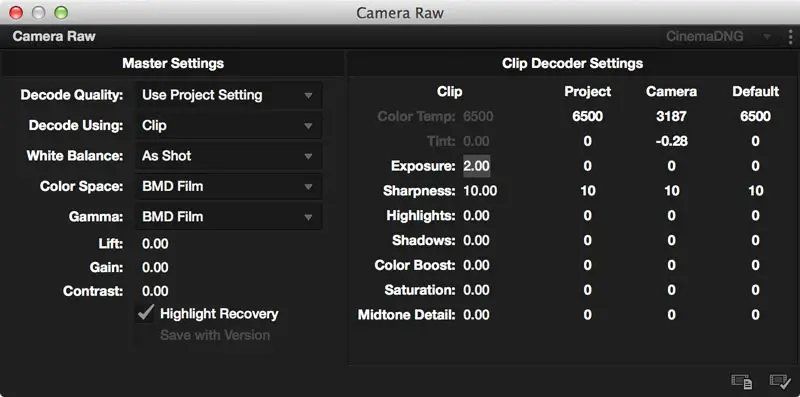
Copy the already downloaded LUTs into the folder and then back to the Resolve Settings window click Update Lists, and then hit Apply at the bottom right. With a new, empty Resolve project opens, go to the Camera Raw tab of the Settings window. From the drop-down at the top right choose CinemaDNG.
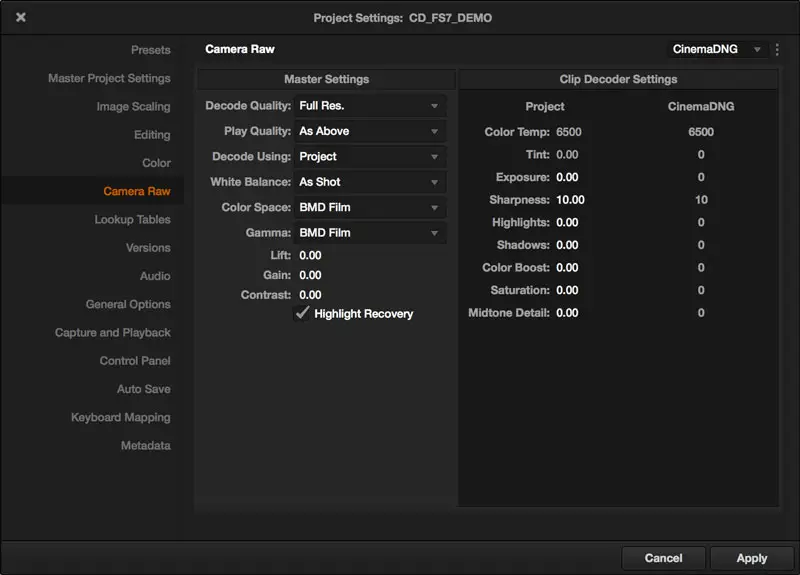
Most importantly set your White Balance settings to As Shot, and Color Space to BMD Film. The provided LUTs provided are designed for footage exposed at ISO 500 shot on the FS7. If your footage was exposed at ISO 1000, set Exposure to 1.00, and for ISO 2000 set it to 2.00, or leave it to 0.00 if you shot at ISO 500.
The next step is to set the decode quality depending on the capabilities of your computer. For dailies it may be fine to render at a lower resolution, however if you intend to use your rendered material to finish from you may want to set Force debayer resolution to the highest quality in the Advanced tab of the DELIVER page.
Try to find the optimal combination that matches your workflow. In the Master Project Settings tab of the Settings window, set the resolution and frame rate for your project and import your media to Resolve.
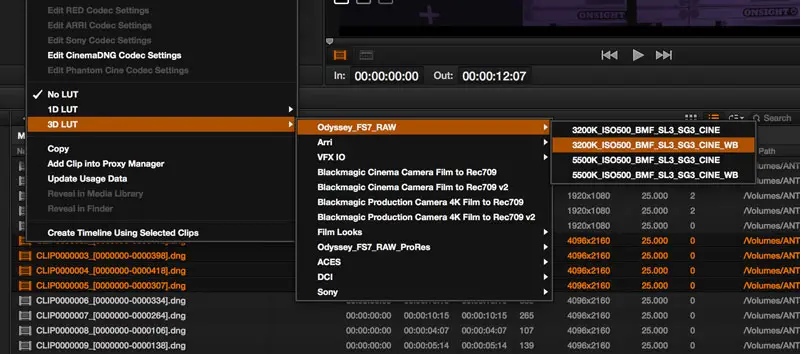
Now, you need to apply the correction LUTs to your media and adjust the exposure if necessary. You can do this in batches of clips which need the same settings. Four LUTs are provided, two for a material shot at 3200K, and two for a material shot at 5500K. The 5500K LUTs can be used on a material shot at 4300K as well. Each colour temperature LUT comes in two versions, one with white balance correction (the name ends in WB) and one without. Choose the appropriate version depending on whether your footage exhibits a strong magenta cast or not.
In the Media Pool select a group of clips shot at the same white balance and right-click to bring up the drop-down menu and select the appropriate correction LUT.
If you need to adjust the ISO for different clips, you can do this in batches as well by selecting Edit CinemaDNG Codec Settings from the contextual menu and changing Decode Using to Clip, and adjusting the Exposure value as appropriate. Then click the tick icon at the bottom right of the window to apply the settings to all selected clips.
After you’re ready with the above steps, you can move to the EDIT page in Resolve and create a new empty timeline. Drag all your clips from the media pool to the timeline to create an assembly of the clips you want to transcode. As an additional step, you can sync the audio here too if required. You should now have an assembly timeline of your material, which visually matches the camera’s S-Log3/S-Gamut3.Cine that you can colour grade and export as any other clip imported in DaVinci Resolve.
When working with ProRes files created by the 7Q from the Raw output of the FS7, most of the workflow described above for DNG files can also be applied apparently without the ability to access and manipulate the Raw settings of the ProRes clips.
[via Convergent Design]
Disclaimer: As an Amazon Associate partner and participant in B&H and Adorama Affiliate programmes, we earn a small comission from each purchase made through the affiliate links listed above at no additional cost to you.
Claim your copy of DAVINCI RESOLVE - SIMPLIFIED COURSE with 50% off! Get Instant Access!


These LUTs and virtually this entire article was written by Nick Shaw at Antler Post. He deserves attribution for his work.