
Many videographers still believe that getting the right balance between skin tones and the rest of the image in post is a serious challenge and something that should be predominantly achieved in-camera for best results. Although this might be a reasonable point, it’s safe to say that you can easily tweak skin tones in DaVinci Resolve 12 and get a well-balanced overall look of your shots at the same time.
Yet, there are a few other important considerations you should keep in mind when dealing with this certain type of situation. Alex Jordan from LearnColourGrading.com showcases his personal workflow by revealing two separate examples regarding colour correcting a shot and also shares his approach when it comes to adjusting skin tones afterwards.
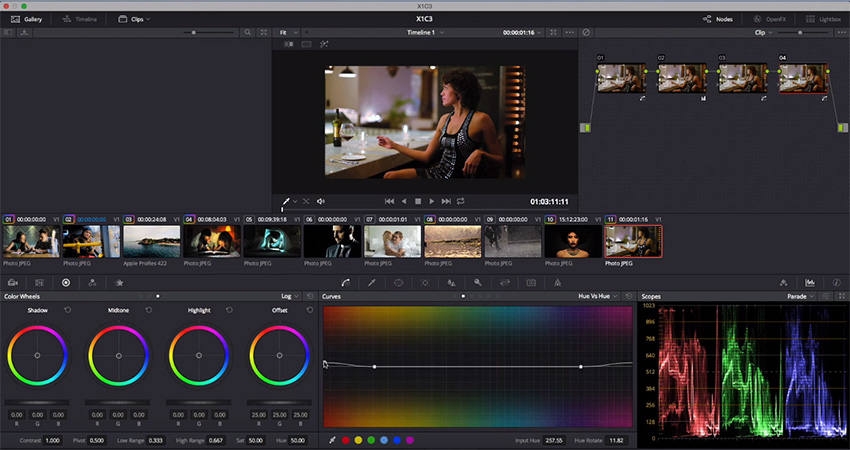
First and foremost, it’s essential to colour correct and balance the overall look of your shot before adjusting the skin tones in particular. Alex suggests to access the Custom Curves in the Colour Page and modify each primary colour separately.
For instance, when you click on a white object in your frame three separate points will appear on the curve each representing the three main component colours – red, green and blue. Usually, to get a neutral and well-balanced look, the three points should be placed on the same horizontal line.

After this adjustment, you can also increase the overall saturation of the image, create another node and then balance the shot again. The latter step is required due to the fact that when you increase saturation some slight colour shifts may occur.
When your shot is perfectly balanced you can move further with the skin tones adjustments. Keep in mind that usually skin tones are mostly affected by the red channel of the RGB Parade. So, to get the perfect skin tones and to tweak them more efficiently you need to access the Hue vs. Hue Curves in Resolve and select the red colour.
By slightly pulling the curve control towards either green or magenta you can set the right skin tones colour based on your personal preferences. In general, skin tones don’t need to be pushed too much to get the best results, so tweaking them shouldn’t affect significantly the rest of your image.
However, if you experience any notable shifts in the colours in the other parts of the shot you can always create a power window and track your talent’s movements, thus isolating the effect from the rest of the image. Overall, this is extremely efficient and effective way to balance skin tones and get the optimal results. For more useful tutorials on colour grading in DaVinci Resolve 12 visit LearnColorGrading.com and also check out Alex Jordan’s insightful courses DaVinci Resolve – Simplified (discounted to $99) and Editing with Davinci Resolve – Simplified ($129). You can also try out the Resolve Grading & Editing Bundle that is currently 58% off and will set you back $149 only.
[source: LearnColorGrading.com]
Disclaimer: As an Amazon Associate partner and participant in B&H and Adorama Affiliate programmes, we earn a small comission from each purchase made through the affiliate links listed above at no additional cost to you.
Claim your copy of DAVINCI RESOLVE - SIMPLIFIED COURSE with 50% off! Get Instant Access!

