
DaVinci Resolve 14 has secured its place in the hall of fame of professional NLEs not only with its compelling and constantly improving video editing capabilities but also with the multitude of excellent color correction and grading tools it already provides. It’s not a secret that among these, curves are one of the simplest and usually most overlooked tools by aspiring colorists. For those who are novices in the realm of color manipulation, curves are typically used to make adjustments to the different light areas of an image (shadows, midtones, highlights) using a graph. The diagram starts out as linear, but as changes are made, it becomes a curve of its own.
While this powerful tool is a staple in post-production color work, it can be a bit tricky to deal with, especially if you don’t know how to adjust the graph properly. For instance, if you try to raise the midpoint of the line, you’ll end up affecting other aspects of the image, namely the highlights and shadows.
To prevent this shortcoming, you need to isolate the effect of the adjustment using placeholders/anchors instead. This is simply done by selecting another portion of the line on the graph. Now, let’s explore the suggested workflow further.
Even though using placeholders/anchors is straightforward, remembering where these should be on the line can get confusing and let’s face it, you may not have the time to try and remember where each placeholder/anchor goes. As pointed out by Alex Jordan from Learn Color Grading, Resolve 14 has a simple solution to this obstacle.
In the Curves tool area, click on the Ellipsis button and then inside of the menu, select Add Default Anchors. By doing so, the program will automatically add the placeholders/anchors to the graph, saving you the time and hassle of having to add them on your own. This will make adjusting your image much more precise in a faster manner.
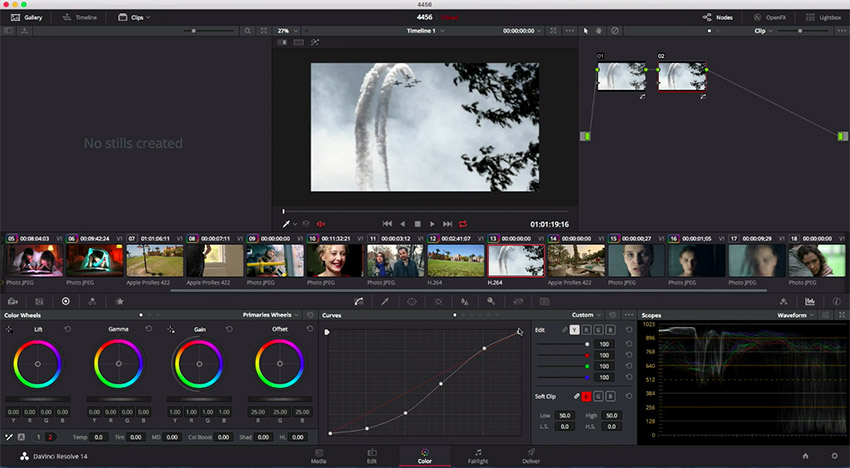
You could expand this workflow further by adjusting the curve points for each of the three main colors Red, Green, and Blue. For instance, you could first do a fast primary color correction to your image then by creating a new serial node and using the default anchors for each RGB channel, you could fine-tune the look of your image afterward.
Overall, this powerful tool gives colorists some amazing capabilities to work with not only when they need to do a quick color correction of their images but also to apply more advanced color grading on the fly. With a little bit of time and practice, this workflow could do wonders for any of your projects as the potential creative possibilities it unlocks are virtually limitless.
[source: Learn Color Grading]
Disclaimer: As an Amazon Associate partner and participant in B&H and Adorama Affiliate programmes, we earn a small comission from each purchase made through the affiliate links listed above at no additional cost to you.
Claim your copy of DAVINCI RESOLVE - SIMPLIFIED COURSE with 50% off! Get Instant Access!


