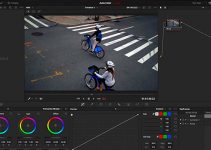
For novice colorists, one of the trickiest aspects of color grading seems to be nailing perfect skin tones. That’s because as you go to grade your shot, you may get carried away with let’s say attaining that appealing filmic teal-orange aesthetic while neglecting all other aspects of your image, including skin tones which generally could be considered as a wrong approach.
To get things the right way, seasoned colorist Avery Peck suggests a simple workflow for achieving great skin tones in DaVinci Resolve 14 in this comprehensive, step-by-step instructional video below.
Before you start fine-tuning the skin tones, you will need to color correct your footage. This part is left to your discretion as you can correct to match other shots in your edit or create the base look of your image. In the case of the video, Avery first adjusts the curves and saturation to his liking.
Next, he uses the eyedropper in the Qualifier tool to select the general color of the talent’s skin tones. Afterward, he utilizes the eyedropper for the Feather tool to fine-tune the isolated area in the frame.
The next step will be to refine the tone of your actor’s skin. Create a circular power window and drag it over your talent’s face. Open up the vectorscope and log color wheels. On the Offset wheel, shift the colors until the skin tones indicator on the vectorscope is on or to the right of the line.
Looking at the midtone color wheels, adjust the color, pushing it towards an orange tint. Be careful here as you want to make sure that the amount of orange you apply is accurate to your actor’s skin. Next, adjust the high and low range of the midtones so that the orange color blends in with the shadows and highlights naturally. This part will require some tinkering on your end so be patient and experiment with values to see what works best for you.
After adjusting the midtones, push the colors of your shadows towards a red tint and be careful as even the most subtle adjustment could go a long way. You can also tweak the low range of the shadows so that the red color rolls into darker areas of your shot.
Move on to the highlights by adjusting the wheel to match the colors of the lights in the frame. For example, if the key light on your actor’s face is more of a bluish tint, adjust the color wheel for the highlights accordingly. Also, similar to the previous steps, you can modify the high range of the highlights to your liking.
After all, is said and done, you should end up with skin tones that are true-to-life. Of course, when you add a grade on top of the corrections, you will need to retain your skin tones through the use of a layered node.
In the video, Aver creates a new node with a traditional teal-orange color grade. To bring back the skin tones, he adds a layered node on top of the grade node. Then he connects the node using the Qualifier effect to the layered node. Finally, he makes the skin tones corrections visible by inverting them in the Key tab.
The last step suggests making some adjustments to the gain in the Key tab and playing around with the color wheels to blend your skin tone corrections with your final color grade. Even though this workflow may take some time and effort, the final result will be worth it leaving you with perfectly balanced images that look polished and professionally graded.
[source: Avery Peck]
Disclaimer: As an Amazon Associate partner and participant in B&H and Adorama Affiliate programmes, we earn a small comission from each purchase made through the affiliate links listed above at no additional cost to you.
Claim your copy of DAVINCI RESOLVE - SIMPLIFIED COURSE with 50% off! Get Instant Access!


