
ProRes RAW is becoming more and more common as tons of recent camera releases are supporting it. Raw video used to be limited to professional cinema cameras and intense workflows with dedicated crew members there just to wrangle the footage. Now you can get it with some off-the-shelf SSDs and a consumer-grade mirrorless camera.
Using it is still a little bit of a challenge if you aren’t used to raw workflows. If you are stepping your toes in the ProRes RAW waters, this video from Harv Video/Audio Stuff walks through how to properly color grade the footage. There are a lot of settings to be aware of, so it’s worth watching.
Before we being, you should understand what ProRes RAW actually is. It is a new compressed format that attempts to retain as much of the raw sensor data as possible. This should provide excellent flexibility in post-production while the near-lossless compression keeps your file sizes smaller than actual raw clips.
Being made by Apple and the ProRes team, ProRes RAW is optimized for certain NLEs—like Final Cut. Also, the ProRes DNA promises ultra-fast playback and editing compared to traditional raw formats which PCs generally struggle with. In Harv’s tests the ProRes RAW does actually run very well. Nearly as fast as regular ProRes.
Harv does his tests with the actual raw clips and chooses not to transcode them. It is possible with many computers actually. The footage is from a Sony FX6 connected to an Atomos Ninja V.
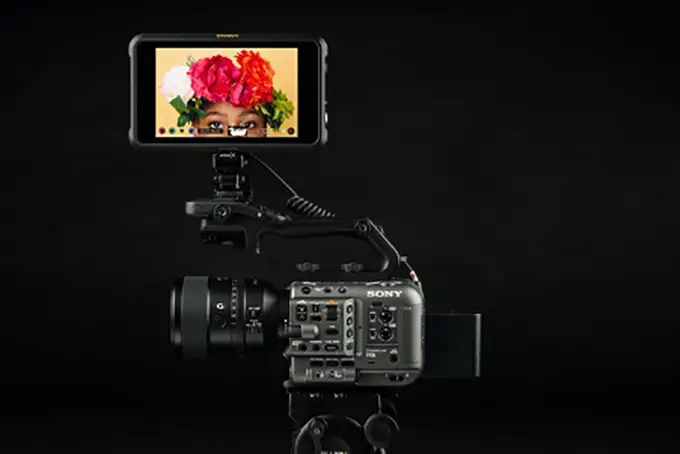
Image Credit: Atomos
After importing into Final Cut you may notice the clip looks a bit off, maybe with blown highlights or weird color. What you want to do is head to the inspector and head down to the raw settings. If you are comfortable with existing log workflows the first thing to look at is the Raw to Log Conversion option. This will take the raw footage and convert it to a log profile of your choosing – though it should match the camera system used.
You can also add on a LUT to give you a decent-looking image to work with. After this, if you want to adjust exposure quickly many cameras will offer ISO control and you can make adjustments there to bring back highlights or raise the shadows.
Going back to just a log conversion you can work in a similar way to other workflows. The chain is usually color wheels for exposure and color corrections. You can use whatever tools you are most comfortable with. Next for Harv is Curves for contrast adjustments. Then he throws on a LUT for a look and then another Color Wheels adjustment for final tweaks.
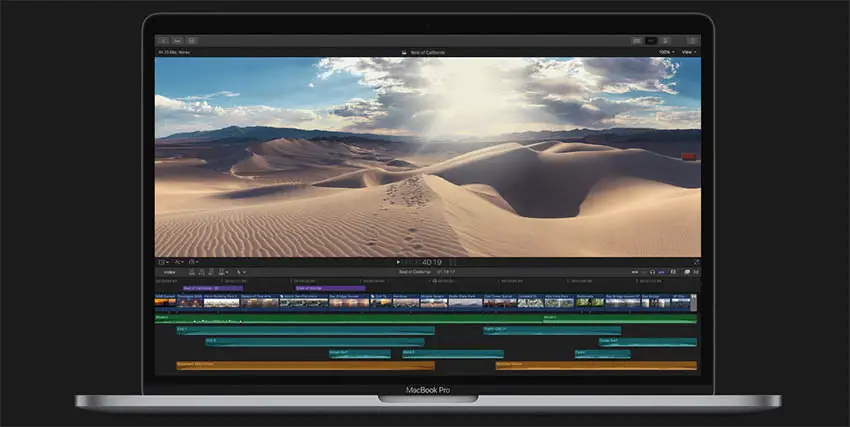
Image Credit: Apple
In this example, Harv applies a corrective LUT to the log footage. Then he uses a plug-in of Lightroom controls to apply some tweaks to exposure, color temperature, highlights, shadows, saturation and just making it look good to his taste. For a final polish he uses the color wheels to desaturate the highlights and bringing up the saturation of the shadows while also adding a little contrast.
For the next example he heads to the Lightroom plug-in, then to color curves, and finally to a LUT. He selects his LUT and then uses the plug-in to punch it up a little bit. For color curves he uses a lot of control points as this has a lot of dynamic range.
Harv found the files to be very easy to work with. There is plenty of detail and dynamic range, plus the ProRes RAW formats are very easy on computers compared to other raw formats. Also, while the footage is quite heavy for storage, the clips are much better than things like REDRAW.
His ProRes RAW Tips:
- Use raw settings to transform clips first
- Make exposure adjustments with ISO
- Transcode or use proxy media for extra speed
- Flexible files can take bold grading
- ProRes RAW has fewer raw settings than conventional raw formats
Have you used ProRes RAW? Harv is giving it a glowing review here.
[source: Harv Video/Audio Stuff]
Order Links:
Disclaimer: As an Amazon Associate partner and participant in B&H and Adorama Affiliate programmes, we earn a small comission from each purchase made through the affiliate links listed above at no additional cost to you.
Claim your copy of DAVINCI RESOLVE - SIMPLIFIED COURSE with 50% off! Get Instant Access!


