
It isn’t often that ARRI announces a new camera system but everyone needs to pay attention. The ALEXA 35 marks a generational leap in functionality and image quality for a company already at the top of the class. It’s truly impressive and it shows why ARRI is a popular pick for top-tier filmmaking productions.
Coming direct from the ARRIChannel is a tutorial on how to put together an ALEXA 35 Production Set. If you are working in the camera department or aspire to be there one day learning the ins and outs of what is likely to be a staple of high-end productions soon should be on your to-do list.
The ALEXA 35 is small and lightweight – it is the new Mini. It also has plenty of controls and mounting points so that you can build it just perfectly for your production.
First steps are to remove the Wi-Fi antennas and rotating the ECS antenna so that you can flip the camera upside down without resting weight on these components. Now, you’ll want to start building up your rig with the BUD-1 Balance Utility Dovetail. This is the core of all the baseplates compatible with the camera and might as well leave it on permanently with the five screws it takes to secure it.
Flipping the camera back over you can reattach the antennas. Now for the top plate. In the Production Set this is the LMS-4 Low Mode Support. It screws in to the top with a similar hole pattern to the bottom. Now you have a ton of accessory mounting points. This is perfect for attaching things like the RMB-7 Rod Mounting Bracket.
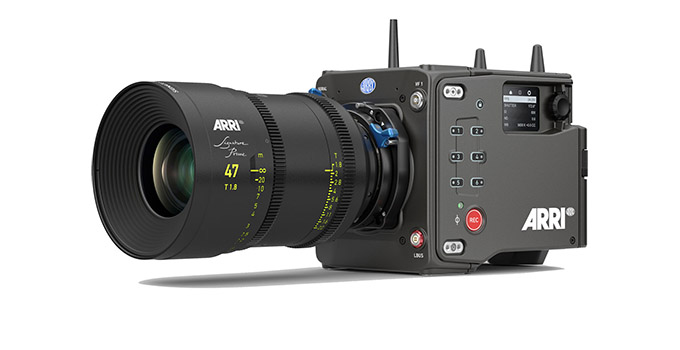
Image Credit: ARRI
You may also want to add the TEB-1 Top Extension Bracket which has an odd design that screws in at an angle. This has a great design that features stoppers to prevent you from accidentally running long rods into the antennas. You could always remove the antennas and stoppers if you have a rig that requires rods to run past the back.
With that set up you can add on your top handle. In this kit that is the CCH-5 Center Camera Handle. It’s a full-length centered handle and features a nifty quick release system that slots into the front of the LMS-4. This handle is longer than ARRI’s previous models and adds more accessory mounts. There is a spot for gimbal mounting and there is an Adjustable Top Plate for MOVI.
Viewfinder mounting is the next piece to look at. This includes the SAS-1 Square Accessory Sleeve and the actual VMB-5 Viewfinder Mounting Bracket.
The sleeve is how you attach the viewfinder mount to the top handle and they recommend placing it towards the front, though there is nothing stopping you from mounting it anywhere you have a 20mm spaced pair of holes.
This bracket actually leaves the 3/8”-16 accessory thread at the front of the handle open. Just slide the VMB-5 into the sleeve. It uses a square tube now so that when you make adjustments the EVF won’t slip and fall down.
As for the actual viewfinder, the mounting system is the same as ARRI has used in the past and has plenty of adjustability. There is also a cable which you can easily connect. This finishes up the top of the camera.

Image Credit: ARRI
Moving to the back of the camera you’ll find a mounting slot for your power options. This could be the B-Mount Battery Adapter or the PDM-1 Power Distribution Module. The PDM-1 Provides a variety of power connections for connecting accessories.
You can power up to 100W of accessories using the 24V outputs with 3-pin connectors, 50W via the two 2-pin LEMO which is shared with a twist D-tap connector which means it is reversible. You can then add the B-mount adapter onto the PDM-1.
Another optional module is the AEM-1 Audio Extension Module which adds two channels of mic preamps. This can be used instead of the PDM-1 as they can’t be used together.
That’s all for the back. Looking at the side you’ll find a few brackets. The first they pick up is the CSB-1L Camera Side Bracket, which is for the left side. There is also the CSB-1R for the right side which is mirrored.
These are made from steel for extra stiffness to help with mounting things like long rods. The left side does also have a rosette for handgrip extensions.
The right side also has an extension which can be added. This adds a whole lot of accessory mounting points. Anything you want or need on this side of the camera can go here easily and it is close to a lot of connectors.
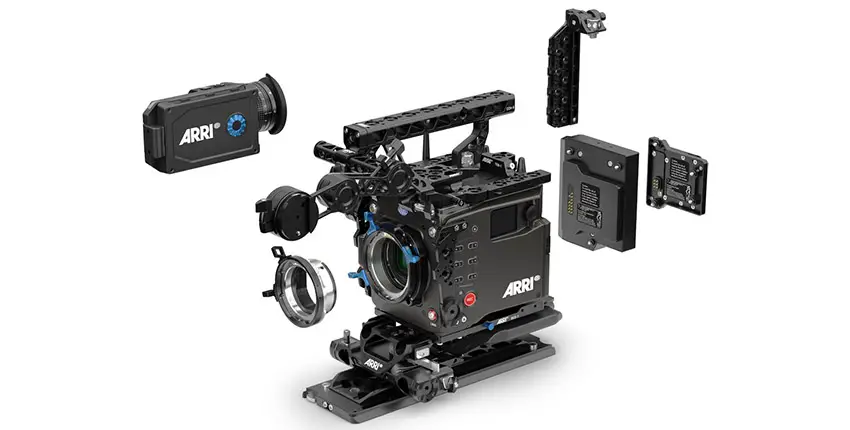
Image Credit: ARRI
A third side bracket is featured in the Production Set: the AMP-1 Articulated Mounting Plate. This can be mounted to a lot of positions using a thumbscrew, making it easy to quickly take it on or off for tool less adjustment. This plate can slide up or down as well as swing out. This makes it possible to get your accessories out of the way to make adjustments or access ports—a needed design change since the body is so small.
For rods you can pick up the RMB-7 Rod Mounting Bracket and attach it in any number of places. This one was designed to be lower profile than earlier versions, making it especially useful with Trinity rings.
Last up is the CBP-5 Compact Bridge Plate (19mm). This slides into your baseplate and locks into the place. It provides a huge range for getting the balance just right. You can also use the SAM-6 Stabilizer Adapter Mount in the same way for quickly switching to a stabilizer system. There are adapter mounts available for MOVI, ARRI, Tiffen Steadicam M1/M2, and the DJI Ronin 2.
Key improvements of the CBP are that the dovetail section is much wider for extra stability. It also offers an option for 15mm rods. The single part does include a shoulder pad to keep it as close to the camera body for better balance. It is now extra secure when mounting onto dovetails without any risk of having it come loose or disconnect while still ensuring good versatility and adjustability.
This shows why ARRI cameras are so great. The amount of energy and thought by the engineers and designers shows here and provides filmmakers with an unbelievable amount of customization. Plus, they try to account for the littlest things to make things work that much smoother on set.
[source: ARRIChannel]
Order Links:
- ARRI ALEXA 35 Cinema Camera (B&H)
Disclaimer: As an Amazon Associate partner and participant in B&H and Adorama Affiliate programmes, we earn a small comission from each purchase made through the affiliate links listed above at no additional cost to you.
Claim your copy of DAVINCI RESOLVE - SIMPLIFIED COURSE with 50% off! Get Instant Access!


