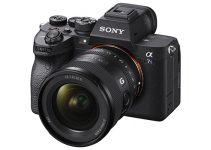
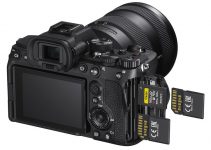
A few years ago a lot of us were looking with a little bit of disdain at what at the time where called EVIL cameras. A poor name choice, there’s no doubt on that, but not many could think of those small crippled bodies as worthy of attention. Those EVIL cameras have evolved a lot, they’re not called Electronic Viewfinder Interchangeable Lens anymore, but mirrorless instead.
One of the first to put an actual dent in Canon’s DSLR hegemony was Sony’s A7S. The reason? Its amazing low-light performance. That has been a beast that has always fascinated most of the filmmakers, the ability to get stunning shots in the dark.
But is it only a matter of having a better camera? Or is it the person behind the camera? Can we follow some guidelines to get better low-light clips? Jason Vong has a few tips for all filmmakers who want to improve his low-light shootings.
Before we begin, we have to put a little disclaimer. The tips you’re going to read are the most general rules, what you would call a rule of thumb. As such, the mileage may vary for each and every one of us, depending on camera, lighting and such.
That’s the main reason for shooting test footage with the camera you’ll be using. You have got to know your camera. That way, you will put under your belt a good experience and most of all, you’ll get to know better the tools you use in your line of work.
#1 – ISO
The first and foremost is quite simple and you may be expecting it: know your ISO limit. Depending on your camera try and test beforehand its real ISO performance.
The more you go up, the more digital noise pours in the frame, ruining the shot. So, rule of thumb, ISO below 6,400 on Full Frame, below 3,200 on APS-C, and below 1,600 on Micro 4/3 system. Why is that? Well, bigger the sensor, bigger the single pixel, lower the noise.
#2 – SHUTTER SPEED
The second parameter you can control on your camera is the shutter speed. You do not want a speed too high, as that will lower even more the light available. A good rule of thumb is keeping the shutter at double the speed of your framerate.
For instance, if you’re shooting at 25fps, keep a 1/50 shutter speed. If you’re at 50fps, go at 1/100. This tip is good not only in low-light but actually in all kinds of shooting environments, as this proportion allows for the best motion blur in the shot.
#3 – NO HIGH FRAME RATES
As a direct consequence of the previous one, if you crank up your frame rate, you’ll have to increase the shutter speed too. At that point, you’ll have to dial in a higher ISO, and you may even fall out of the previously suggested maximum ISOs. It’s a blanket that’s always too short. If you want to play it safe, limit your frame speeds.
#4 – FAST GLASS
Almost every videographer should have a couple of fast primes in his bag. A nice and bright optics can make all the difference in some situations. A 50mm 1.4, for instance, will be 4 stops faster than an f3.5 lens. What does that mean? That shooting in the same condition, you could lower your ISO from 6400 down to 800 and have almost the same exposure!
Why aren’t we all shooting with fast primes? Well, there are two main reasons. The first being the price, as a fast lens can easily cost twice as a similar slow lens, if not more. The second reason is the depth of field. Shooting full wide on a fast lens means having a focus so shallow you could easily lose your subject. Sometimes on very fast lenses, you could even end with one eye in focus, while the other is blurred.
#5 – USE AVAILABLE LIGHT
Look around. The cities we live in are now flooded with artificial lights. Unless you’re shooting in the countryside, there’s probably some light available on location. Turn it at your advantage.
Try to direct the talents using those soft and wide store-windows, use those colored neon signs to get some backlight and so on. When scouting, take notes on possible light sources that you could use in a creative way.
#6 – MAKE LIGHT
If the location is dark, then even a tiny amount of light will make wonders. We are fortunate enough to live in a time when LED lighting has dramatically lowered the price of light fixtures.
Entry-level LED panels will set you back just a few bucks, but if you are a little handy you could DIY some lights or repurpose different lamps to your needs. Be creative, you need so little to give a small push to those dark mid-tones.
#7 – CHANGE SHOOTING MODE
If you can’t defeat them, befriend them. If all of the above did not help, it’s time to give up. Or is it? Try some different techniques, like a timelapse.
Not being limited by the video, you can shoot some quite bright stills with no lights and slow lenses, you just need to take your time. Having longer exposure settings, sometimes even more than a second, can create some perfectly bright and usable time-lapse sequences if you need the shot of that particular location.
So, these were some tips from Jason Vong, but these were not the only ones. Another noteworthy tip includes the use of noise reduction plugins. Many filmmakers seem to have great results, others prefer to manually grade and set filters to reduce noise. Overall, that’s a personal choice, depending on your workflow, but it’s another viable option to improve your low light footage in post.
[source: Jason Vong]
Disclaimer: As an Amazon Associate partner and participant in B&H and Adorama Affiliate programmes, we earn a small comission from each purchase made through the affiliate links listed above at no additional cost to you.


