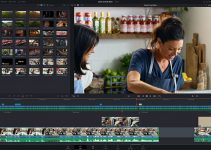
Animating grades in Resolve 12 is another powerful feature that can help you to complete the look and improve the visual aesthetics not only of your static shots but also of those where more complex camera movement is involved such as dolly shots, panning shots, tilt shots, tracking shots, etc.
In the next colour grading tutorial, Casey Faris showcases how to do those grades the easy way by exploring a few real-life examples and situations that every colorist might come across eventually. One of the common scenarios you might stumble upon in your daily workflow is indeed animating in between two grades that are part of the same clip.
A good example is the panning shot showcased in the video above where you might have a brighter part of the scene in the beginning that eventually pans into a darker area. Obviously, you can’t apply only one grade to get optimal results. The solution is doing two grades and fade in between them.
You can start at either side of the shot and do two different grades. Just make sure that you create a separate Serial Node for each look. Once your primary grades are completed, you can animate those by using the Key Panel in the Color Page of Resolve 12. Under the Key Output section, you will find the Gain setting. In a nutshell, it controls the opacity of each node applied to your footage.
So, all you need to do is to keyframe the opacity of your nodes accordingly as the camera movement unfolds. You can do so in the Keyframes palette. Just select the Corrector you want to animate, enable the auto keying feature and set the Gain accordingly.
Resolve 12 will create a new keyframe every time you modify any of the selected parameters. Keep in mind that the Node Key settings are listed under the Defocus property in the Keyframes Panel. You can enable the auto keyframing feature only for this property if you don’t want to animate any of the other controls accidently.
In the second part of the video Casey also showcases how you can toggle between two grades instantly without fading in between along with a simple technique that can help you to add keyframes manually when you want to colour grade a moving object in your frame.
If you liked this video, don’t forget to subscribe to the Casey Faris’ YouTube channel where you will find more insightful colour grading and post-production tutorials. You can also check out the in-depth and informative DaVinci Resolve 12 Colour Grading and Editing Courses by our friend Alex Jordan in 4K Shooters Store.
[source: Casey Faris]
Disclaimer: As an Amazon Associate partner and participant in B&H and Adorama Affiliate programmes, we earn a small comission from each purchase made through the affiliate links listed above at no additional cost to you.


