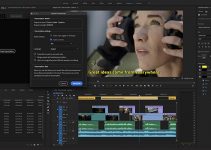
How many times did you get frustrated by the fact that you can’t access or even see the audio waveform when editing your multicam sequence in Premiere Pro CC? Maybe, you’ve just finished editing a music video for a client shot on multiple cameras and you need to replace the current audio mix with the final master.
Or, you just want to enhance the dialogue of your corporate video once the rough edit is completed by adding a few sound effects here and there. Either way, it will be a lot easier if you have direct access to the audio waveform in your final multicam sequence instead of going back to the source sequence containing all separate audio tracks. Theo of MiesnerMedia will show us a super simple trick on how to tackle this annoying issue.
The solution is indeed quite simple. Just make sure that you’ve selected your multicam sequence, head over to Sequence in the top menu and choose Render Audio. The process itself shouldn’t take too long, considering the fact that you’re rendering only the audio of your multicam clip. Once the process is completed, the audio waveform should automatically appear under your multicam video track.
Now, you can edit your audio clip just as any other piece of media imported in Premiere Pro CC. Keep in mind, though, that if you want to tweak your edit further in the source sequence, you’ll need to render the audio once again as you’ll lose all the changes you’ve already made. Even it may sound obvious, you should better lock your video first, and then do further tweaks related to the audio mix later on.
All in all, this workflow can be convenient on occasions when you’ve completed the rough video edit of let’s say an interview and then you want to add more audio elements to the timeline such as music beds, ambient sounds or any other special audio effects. Using this approach could help you to avoid the clutter you might comes across when having all audio elements on a single timeline. In other words, you can add those new elements directly to your multicam sequence instead of dropping them on the source sequence timeline where you’ve already done your initial multicam editing.
Alternatively, if you plan to do more complex audio mixing, you should better export your audio clips by using OMF (or any other transfer format) to a dedicated DAW software and edit audio media separately if that makes more sense. As a rule of thumb, that’s always the recommended workflow for achieving optimal results.
[source: MiesnerMedia]
Disclaimer: As an Amazon Associate partner and participant in B&H and Adorama Affiliate programmes, we earn a small comission from each purchase made through the affiliate links listed above at no additional cost to you.


