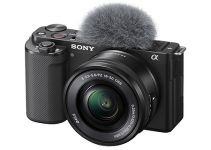
It is incredible just how good your average mirrorless or DSLR camera has gotten at video. You have cameras like the Sony A7III shooting footage suitable for films or broadcast television. The only downside I’ve found is that it has led to extremely complicated menus and control setups.
If you happen to be an A7III shooter working with video there are a lot of settings and tricks to learn that will maximize performance. Josh Yeo of MAKE. ART. NOW. Is here to help by showing you all the settings he uses to make his A7III a video-shooting powerhouse.
There are arguably too many settings to just describe and list out here, especially since the video does a very good job of walking you through setting them up yourself. I’m just going to focus on the most important or complicated ones.
Obviously, step one is to pop the camera into Movie mode on the top dial and then set it to Manual Exposure. This gives you full control over your image and is important for creating a cinematic look.
The next thing to choose is the format. The best you can get is XAVC S 4K at 100 Mbps—make sure you have an SDXC card rated as a Class 10, U3.
As for frame rate, 24p (23.976 technically) is your film-like setting while 30p (29.97 fps) is for network television. Now for a reminder that the A7III does actually crop 1.2x for 30p while you get full width for 24p.
With the resolution, bit rate, and frame rate set you are in a really good spot when it comes to capturing high-quality video. Also, you will want to adjust your S&Q settings if you want to shoot at the max of 120 fps in Full HD.
Next up is autofocus. This is one of the huge advantages of current mirrorless cameras, as their on-sensor focusing systems beat many conventional video cameras.
Yeo recommends setting the AF Drive Speed to Fast and the AF Tracking Sensitivity to Responsive. This will keep your subject in focus, though I will say that I do occasionally prefer Normal for doing focus racks on still subjects.
Audio is up next, and I think this is tricky. If you are using a powered 3.5mm mic like the Rode VideoMic Pro mentioned in the video, you can probably do great with his suggestion to set your Audio Recording Level to 7, but for any other situation, you will want to double check. Make sure you are hitting around -12 to -6 dB for your peaks.
Now there are a lot of custom button settings. This can be highly personal but I do want to pick out a couple of settings that deserve a custom setting.
These are Picture Profile, White Balance, and APS-C/Super35 Mode. Having them just a button press away will save loads of time. Also, the Movie w/ Shutter On lets you start recording with the shutter button in addition to the record button.
You will want to turn on Touch Operation, because if you map Center Lock-On AF it let’s you quickly choose a subject for AF tracking. Assuming you are using S-Log2/3 or HLG, you will definitely want to activate the Gamma Display Assist Setting.
Other helpful tools are Zebras, Peaking, and the Marker Display if you need. Beyond that are a lot of details that are best left up to personal preferences.
Think you’ll be trying out these settings on your A7III? While I have my own setup I’m thinking of adopting at least a couple of these. Also, if you plan on shooting in low-light, there is another video on the MAKE. ART. NOW. YouTube channel specifically for that.
[source: MAKE. ART. NOW.]
Order Links:
Sony Alpha A7III Mirrorless Camera (B&H, Amazon)
Disclaimer: As an Amazon Associate partner and participant in B&H and Adorama Affiliate programmes, we earn a small comission from each purchase made through the affiliate links listed above at no additional cost to you.


