After Effects is a daunting software. Most filmmakers feel intimidated since it’s perceived as a complicated mess. The reason is probably that it requires a completely different set of skills from those needed to shoot and edit. Not everyone is proficient indeed, but since the more we evolve in this digital world of over the top media consumption, the more it’s necessary to be jack of all trades.
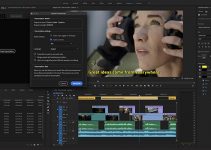
Sometimes it’s also easier then we’d expect, like face-swapping, for instance. Anyone would bet it’s a quite complicated and pro-level task, right? Well, here we have a simple and straightforward tutorial made by flomotion, to track the movement in a shot using Mocha in After Effects by leveraging tracking data to substitute a talent’s head.
As you can easily imagine, we start inside After Effects, and all we need is two clips: the background-clip, where we intend to place our face, and a green-screen shot of the given face.
Here we see the famous “Split” commercial with the martial arts champion and actor Jean-Claude Van Damme as the background shot and a simple mugshot for the head. It’s worth noting that the master shot is in FullHD, while the head-shot is a 4K clip.
The first step is to isolate the head from the green-screen. Even if the talent stands still, there’s always going to be a little movement, which means that we have to stabilize the clip since even the slightest movement will be extremely apparent once the head is replaced in the master shot. To do so, just find the Mocha plugin in the effects library and drag it over the clip.
If you are in the Essential workspace, you can easily revert to the Classic one if you prefer. Then, head to the first frame, define the area Mocha needs to track. In this case, this is the neck of the talent, so use the rectangular spline tool to define it.
Now, remove skew as stabilizing parameter if as in this case there’s none, and track forward. Once it’s done, save the layer, as it’s always better to keep things organized, and get back to AE.
Next, we can match the position of the head to the background. It’s better to precompose, since having clips of the same size and position helps. Keep in mind, though, that some details could be cut out from the final clip. If that’s the case, enabling the collapse transformation option will solve the problem.
Furthermore, applying the tracking data in reverse will lock the neck, and thus our head in position. A little bit of keying to eliminate the background, and we’re halfway done. Now let’s get to the background clip. Again, apply the Mocha effect and track the clip.
You’ll be tempted to track the face, but we’ll actually stick the new head on the body, so the jacket can be a better area to track. Select a couple of areas on the same plane and track as needed, forward or backward. Once done, head to the first frame, where you’ve previously matched the head and extend the planar surface to be full-frame.
From there on, it’s more a matter of color grading to match the skin tones and keying to merge the two clips. Why keying? Well, if you’re lucky and have the talent whose face is going to be replaced wearing a bright colored jacket like this blue denim one, it’s so easy to just duplicate the clip, key the jacket out, invert the key, and boom! You’ve got your face merged onto the talent’s body.
[source: flomotion]
Disclaimer: As an Amazon Associate partner and participant in B&H and Adorama Affiliate programmes, we earn a small comission from each purchase made through the affiliate links listed above at no additional cost to you.
Claim your copy of DAVINCI RESOLVE - SIMPLIFIED COURSE with 50% off! Get Instant Access!


