Blackmagic has been making wonderful cinema cameras with loads of features that are usually only available in systems costing multiple times more. Getting 4K raw, 6K video, advanced recording options, and plenty more in these Pocket Cinema Cameras has come at a cost. They usually need a few accessories to make them usable for more pro shoots or just to reasonably use certain tools.
Caleb Pike from DSLR Video Shooter immediately points out the two biggest issues with the Pocket Camera 4K when it comes to rigging – the rear screen doesn’t have any articulation and there’s no good place to add an additional power system. To solve these issues as well as a bunch of smaller ones, Caleb built his own “ultimate” rig and put together a video to help us all.
First and foremost, here are all the bits and pieces you’ll need for this rig.
Order Links:
- Blackmagic Pocket Cinema Camera 4K (B&H, Amazon)
- Blackmagic Pocket Cinema Camera 6K (B&H, Amazon)
- PORTKEYS BM5 5.2” Touchscreen Monitor (B&H, Amazon)
- PORTKEYS BT1 Bluetooth Module (B&H)
- Tilta BMPCC 4K/6K Advanced Module Cage (B&H, Amazon)
- SmallRig Swivel and Tilt Monitor Mount with Cold Shoe (B&H, Amazon)
- D-Tap Power Cable for Pocket Camera 4K/6K (B&H, Amazon)
- HDMI Cable (Amazon)
- SmallRig 942 15mm Rod Bracket v3 (B&H, Amazon)
- SmallRig 1842 Compact Tilting Monitor Mount (B&H, Amazon)
- NiceyRig Multi-Functional Cheese Plate (B&H, Amazon)
- NiceyRig V-Lock Plate Assembly Kit (B&H, Amazon)
- Intellytech Pocket-V 98Wh Li-Ion Battery (V-Mount) (B&H, Amazon)
- CAMVATE Multifunction 15mm Rod-Mount Cheese Plate (B&H, Amazon)
- D-Tap Splitter (B&H, Amazon)
- Metabones T Speed Booster XL 0.64x Adapter (B&H, Amazon)
- Viltrox EF-M2 II 0.71x Focal Reducer Adapter (B&H, Amazon)
- Tilta Tiltaing Lens Support Type I (B&H, Amazon)
- Tilta Nucleus-Nano Wireless Focus Control System (B&H, Amazon)
- Tilta Tiltaing Side Focus Handle Type II (B&H, Amazon)
- SmallRig Mini Quick Release NATO Rail (48mm) (B&H, Amazon)
- Niceyrig Universal NATO Clamp to ARRI Rosette (B&H, Amazon)
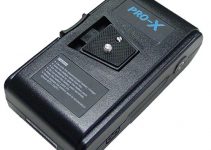
Serious shooters will quickly find the limitations of a single battery pack, meaning a bigger battery solution is the first thing to look at. How should you mount a battery?
Well, Caleb’s solution is to mount it behind the camera and while you shoot it can flip up to help with balance and size. It does flip up and cover the screen, making his monitor choice super important.
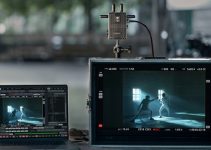
Going with the PortKeys BM5 solves all these issues thanks to a Bluetooth camera control module. It allows you to control all your important record settings—including things like white balance and ISO—via the external monitor. That’s just cool in general too. Let’s get into how to build this rig.
Configuring a proper rig will all start with a nice cage. Caleb recommends the Tilta BMPCC 4K/6K Advanced Module Cage for his setup because it comes with some solid accessories.
Add on a SmallRig Monitor Mount with cold shoe, a D-tap power cable for the Pocket Camera, HDMI cable, 15mm rail block, SmallRig 1842 monitor mount, NiceyRig Multi-Functional Cheese Plate, NiceyRig V-Lock Plate, a V-mount battery such as the Intellytech Pocket-V, a CAMVATE 15mm Rod Clamp for power outlet, and a D-Tap Splitter. Phew, that’s a good list for you to get started.
For optional accessories, there are the usual adapters/speed boosters and extra support mounts, but the real winner in my opinion is the Tilta Nucleus Nano Wireless Follow Focus since it can be configured with the Tiltaing Side Focus Handle Type II for easier control. Mounting that will require the SmallRig Mini Quick Release NATO Rail and NiceyRig NATO Clamp to Rosette.
All the essential components come in at a quite reasonable price point around $1300. If you add a speed booster and the follow focus system that will inflate the price up to $2400. All told, that is quite reasonable considering the functionality you are getting out of it.
Setup is relatively straightforward. I appreciate how easy it seems to be to break down if you ever need to. Especially since the camera can be slid out of the cage. The battery power is great and should help extend shooting times when needed and that monitor is really cool.
I’m not going to spend time explaining how to build it, Caleb does an amazing job in the video and you should absolutely check it out.
Anything you would add or swap out for your own “ultimate” rig?
Disclaimer: As an Amazon Associate partner and participant in B&H and Adorama Affiliate programmes, we earn a small comission from each purchase made through the affiliate links listed above at no additional cost to you.


