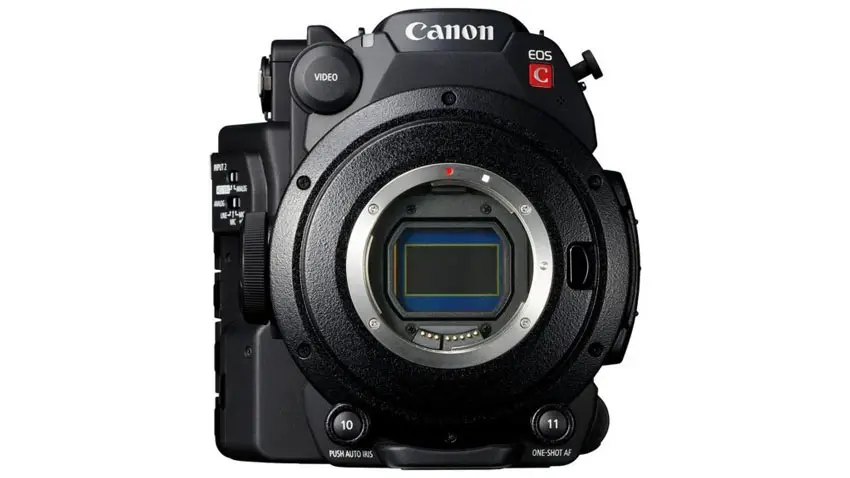
All cameras suffer from some degree of visible noise that is inherent in how they capture an image. These unwanted variations in brightness and color are usually processed out by proprietary, in-camera noise reduction, but when you’re filming in raw, the images you’re getting are exactly how the sensor is collecting them.
You take the good with the bad, and fortunately the Canon C200 has an excellent signal-to-noise ratio when compared to most professional cinema cameras. But if those last little specks on the screen are really bugging you, there are several methods you can use to eliminate them.
Rubidium from Crimson Engine has posted a quick guide to effective exposure techniques to mask the noise when filming with the C200 that you should really check out. The tips and information presented here can apply to any camera.
Stick around after the break, and I’ll tell you how I deal with noise issues when filming with my C200 as well.
Canon C200 Key Features
- 4K UHD and DCI video
- Cinema RAW Light at 4K 60/50p at 10 bit, 30/25/24p at 12 bit
- Full dynamic range at 4K
- Innovative Focus Control
- Dual Pixel CMOS AF
- Over Sampling HD Processing
- Wide DR Gamma
- ISO range 100-102,400
- In-Camera ND Filter
- ACESproxy Support
- Dual SD card slots, one CFast internal card
- Improved Grip
- Supports Canon Cine-Servo, EF Cinema lenses
The Canon C200 is, in my opinion, one of the best all-in-one cinema cameras you can buy today. Not only is it incredibly affordable, it shoots fantastic images, uses an amazing raw codec, is easy to hold and operate, offers great battery life, and utilizes Canon’s stellar dual-pixel autofocus technology, which is a must have for a solo shooter on the go. In my opinion, there is no camera that even comes close at its price.
Naturally, there is some degree of noise that is captured when filming with the C200 – just as there is with all cameras. Even if we don’t realize it, most cameras that shoot in a compressed format are applying noise reduction to their images in real-time. Noise reduction is what allows a camera like the Sony A7s II shoot such stunning low-light images that are seemingly noise-free. However, when you’re shooting in raw, you want all of the information that the sensor is capturing and noise reduction is left up to you in post.
Canon C200 Noise

The Canon C200 features a sensor with a native 400 ISO and is capable of filming 13.5 stops of dynamic range. When filming in raw, the bottom two stops are boosted to accommodate the Canon C-LOG 2 picture profile that is native to Canon’s cinema raw light codec on the C200 when it is editing in Premiere Pro or FCPx. As a result, you can often see noise dancing around at the low end of the signal.
It is important to note that C-LOG 2 is not the native profile for raw on the C200 but how the Premiere and FCPx plug-ins process the CRM files from the camera. In the latest versions of Resolve, you have full access to the raw signal including Color Space, Gamma, and ISO settings which will offer you more options for improving image quality.
To understand where the noise is coming from at ISO 800, you have to know a little more about the camera sensor. Though it is advertised as having a base ISO of 800, Canon only recommends ISO 800 for filming in MP4. For all raw shooting Canon recommends a base ISO of 400 to get the most out of the sensor, which means that the native ISO is really 400.
Turning Down The Noise
The sensitivity of an image sensor is fixed at its native ISO. When you increase or decrease that ISO setting, you’re either amplifying or un-amplifying the captured signal by a power of 2 and you’re increasing the noise with it.
As a side note, the in-between ISO settings on digital cameras are just software-based. This is why some lower-cost cameras only offer 100, 200, 400, 800, 1600 ISO settings, and not the 250, 1000, or 1250 ISO settings you might see on a DSLR. Those in-between ISO settings are approximated by software.
With that in mind, you might now notice the same noise levels at 1000 ISO as you do at 1600 ISO – the software is effectively just decreasing the brightness of the 1600 ISO image from the sensor.
Rubidium’s method of eliminating the sensor noise is simple: turn down the ISO. Though he doesn’t refer to it as this, the method he is using is called Exposing To The Right or ETTR.
Exposing To The Right
When Rubidium is filming at an ISO of 200, the camera is still capturing at a native ISO of 400, and by setting his ISO to 200 he is in fact using the camera’s software to un-amplify the image and push the native sensor noise from the low channels into the blacks where it is no longer visible.
Since the noise that is inherent in the C200 is in the low channel, and there is an awful lot of information that is being captured in the mids, you can increase expose your shots by 1 to 2 stops by increasing the lighting in the scene, or opening up the lens, and lowering the exposure in post as long as you don’t blow out your highlights – literally exposing to the right side of the histogram.
This is an absolutely terrific method of filming as you are using the camera’s sweet-spot to capture the cleanest images possible. You can display it at a lower ISO so that comes out looking properly exposed on the monitor, or just keep your eye on the histogram and make sure it doesn’t get blown out.
Auto Black Balance
Another method of reducing noise on your C200 is Auto Black Balancing (ABB in the C200’s menu), which calibrates the signal for no light.
Similar in concept to white balancing, black balancing ‘eliminates any residual current being output from the pixel sites under conditions of complete darkness’ *Wikipedia, and is done by removing the lens, placing the original body cap on the camera, and activating the setting in the menu. The whole process takes about 30 seconds.
Canon recommends doing this after the camera has sat for long periods of time, but users often recommend black balancing your C200 camera religiously, at the start of a shoot day, after changing the ISO, white balancing, and maybe one more time for good measure.
This is effectively telling the camera what absolute zero light is, and greatly reduces noise in the image.
Noise Reduction Software
As an absolute last resort, you can use noise reduction software to clean up your footage. My preferred noise reduction software is Neat Video, which is available as a plug-in for pretty much every editing system and is fairly inexpensive at $75-250 per license (depending on your editing software).
In Neat Video, users identify a plain, uniform, patternless section of the image to allow the software to create a noise profile that perfectly eliminates image noise. This can be done by highlighting a small section of a blank wall, or shooting a grey card between setups with this plug-in in mind.
The algorithm used by Neat Video does a fantastic job to retain image detail while removing the ugly noise, but it is very render intensive and should only be used in final finishing.
Summary
You can see how fantastic of an image you can get out of a C200 by just making some minor adjustments to how you shoot. Rubidium’s image clarity and color for this shot are fantastic.
All digital cameras have some amount of noise present in their signal just as certain film stocks have grain. With film stock, we tend to see grain as pleasing or even professional but digital noise is ugly, distracting, and is thought of as being low-quality and unprofessional.
There are a few different ways to reduce noise on a professional camera:
- Expose To The Right
- Auto Black Balance
- Avoid Overheating
- We didn’t talk about this in the article (if you were paying attention) but overheating can also cause noise.
- Noise Reduction Software
Lot of great plug-ins are out there that can really help make noisy shots look great if you made a mistake, or if there just wasn’t enough light available, but the best possible method of noise reduction is noise avoidance by using the ETTR method described by Rubidium.
Set your ISO levels one-stop below their native, and increase your lighting and/or decrease your f-stop and watch the noise fall away.
[source: Crimson Engine]
Order Links:
Canon EOS C200 Cinema Camera (B&H, Amazon)
Disclaimer: As an Amazon Associate partner and participant in B&H and Adorama Affiliate programmes, we earn a small comission from each purchase made through the affiliate links listed above at no additional cost to you.
Claim your copy of DAVINCI RESOLVE - SIMPLIFIED COURSE with 50% off! Get Instant Access!


