Classic film looks usually have a degree of softness to them. It was natural since film itself was never perfectly sharp and other variables like older lenses or even anamorphics are naturally not as tack sharp as modern optics. Digital brings an almost unnaturally high degree of sharpness now, especially as we start pushing resolutions up and up and use incredibly sharp lenses.
Slightly reducing this sharpness is a common approach for many and Harv Video/Audio Stuff goes through five ways – split among in camera techniques, camera settings, and editing in post – to do this in your own videos.
1. Camera Settings
This should make a lot of sense. If you are working with Picture Profiles in any way there is likely a setting called Detail or even just Sharpness. Go find this and turn it down all the way (or not, depends on your taste). Cameras do some in-camera sharpening and this is an easy way to control it. Default is usually always a bit of sharpening.
2. Lenses and Apertures
Most modern lenses are optimized for sharpness and detailed. Combine that with high-resolution sensors and you will capture a ton of detail. Using optimal settings, such as stopping down a tad, will result in sharper, more clinical images. Setting the lenses at their limits, such as wide open, you can realize some of the natural flaws of the lens and get a more organic look.

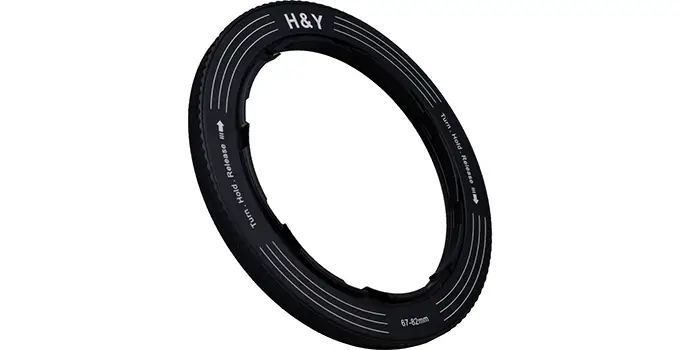
Image Credit: H&Y Filters
3. Filters
There are filters which have the job of making things softer and they are super common in video production. Black Mist filters are popular and Harv uses the H&Y RevoRing system with a 1/8 Black Mist. This isn’t too strong so it will give some slight blooming to help soften everything up.
For ultra-sharp cameras where you are seeing moire this can solve this problem. Blooming the highlights then provides better falloff and the shadows get lifted a touch. Most filters will actually have some sort of impact.
4. Editing
You can do some blurring and effects in your NLE to soften up an image. A touch of 1.2% gaussian blur can do the trick. Not ideal for a workflow but it is an option.
5. Resolution
This one is weird, but you can also shoot in a lower resolution and upsample it to your timeline. For example, this is shooting is Full HD and then using a 4K timeline and export. However, this relies on the capabilities of your camera. A camera like the a7S III which will do proper downsampling to get beautiful Full HD video will look good and will work okay on a 4K timeline.
Other cameras might do line skipping and in these instances, you might end up with more artifacts that you don’t want to see. Still, I wouldn’t do it and Harv doesn’t even strongly recommend it.
Do you have any preference on either highly detailed or slightly softened footage when you shoot? Any tools in your bag?
[source: Harv Video/Audio Stuff]
Order Links:
- H&Y Filters RevoRing Variable Adapter (B&H, Amazon)
- H&Y Filters 1/8 Black Mist Filter for RevoRing (B&H, Amazon)
Disclaimer: As an Amazon Associate partner and participant in B&H and Adorama Affiliate programmes, we earn a small comission from each purchase made through the affiliate links listed above at no additional cost to you.
Claim your copy of DAVINCI RESOLVE - SIMPLIFIED COURSE with 50% off! Get Instant Access!


