
Easyrigs are supposed to be easy to use – think about the name. Still, just because something is easy doesn’t mean that getting it tuned up in the best possible way doesn’t require a bit of extra know-how and time. Depending on your camera setup and your experience with these types of rigs you could use with some tips and tricks.
Lucky for you (and me to be honest), the guys at LensProToGo have spent some time to put together a solid video that details how you might want to set up all the different components along with some general tips on operating it.
What is an Easyrig? Basically, it’s a backpack and vest system with am arm and cable that allows you to more easily carry heavy camera rigs. It also keeps your camera a lot more stable.
It works by offloading the weight of the camera onto your back, waist, and core instead of just your arms. It makes the camera feel weightless and allows you to operate the camera for much longer without getting tired. It’s safer, too.
A key benefit is that you can get a realistic handheld look without the strain of shooting purely handheld.
Time for the tips. They start super easy by explaining how to put it on. Step one is to simply put it on with the shoulder straps like a backpack. Then you want to secure the belt and tighten it up and then do the sternum strap across your chest.
If you haven’t worn one before the bar above your head can be concerning, but it is very safe. You just need to be careful of those around you more than yourself.
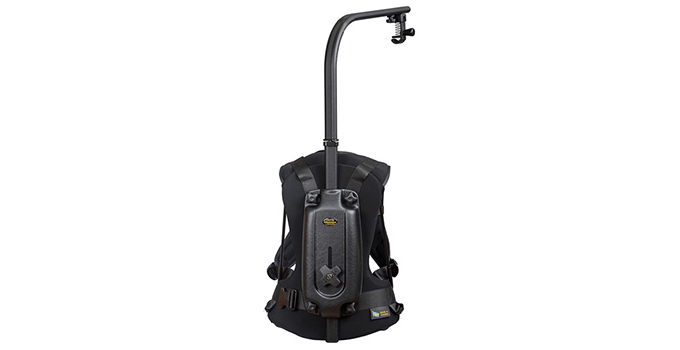
Image Credit: Easyrig
The system does depend on having a top handle or other sort of top mounting option on your camera. You might have to pick up a new top handle or mounting point but as long as you have something it should be fine. One thing you do want to be aware of is the balance of your rig.
Longer rigs might want to have a handle or mounting point closer to the center of gravity instead of just right over the top of the camera body. You want it to be balanced, and by flipping your top handle to go forward instead of backwards you can get closer to that without changing all that much.
Getting the camera on the rig is something to be careful with and can be done solo or with an assistant.
You’ll want the camera at least waist height. Then, grab the mounting hook on the cable with two hands. Get some slack and keep the open side of the hook facing your body.
Bend down to get the hook to meet and catch the top handle completely. Now you can carefully secure the locking part. Make sure there isn’t any wiggle, or at least as little as possible.
Removing the camera is basically the opposite process. Bend down and hold down the hook so that it isn’t holding up the camera at all. Loosen the lock and then slowly allow the hook to be retracted back into the top handle.
If you have an extra set of hands they should hold it up closer to the hook to make it easier to secure on the hook. Then make sure there is a verbal confirmation that it is secure before they release the camera. It’s the reverse for removing it.
Something that an assistant can help with is adjusting the tension after it is holding the camera. The AC can adjust the tension while the camera is mounted so you can get it tuned up just right.
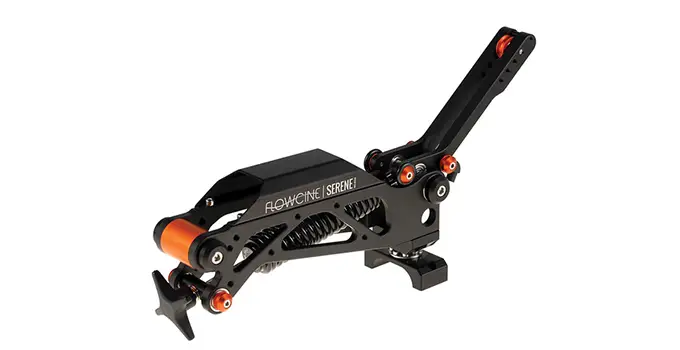
Image Credit: FLOWCINE
An addition that they made to their Easyrig was the FLOWCINE Serene at the top. It is a 2-axis spring arm stabilizer that attaches to the top Easyrig arm. What it does it help minimize some of the judders common with walking for even smoother movement.
It also by its nature does some other good things like extending the rig out a bit farther from your body and raises up the potential height of the camera.
The thing to understand is that an Easyrig is good for handheld cinematography – it is not meant to replace a gimbal. A gimbal is meant to fully stabilize your image while an Easyrig still retains some of those handheld movements for a different aesthetic.
Now, you can combine these two tools and mount a gimbal to an Easyrig to reduce the weight on your arms for longer shooting days. It’s a bit more cumbersome but a viable option if you need it.
A final tip is to have the camera at a slight angle to your body. It actually gives you a better degree of control over the camera’s position. Longer rigs can still be cumbersome when used directly on too. A slight angle can give you the space needed to operate smoothly.
Have you used an Easyrig before? Have any of your own tips or questions?
[source: LensProToGo]
Order Links:
Disclaimer: As an Amazon Associate partner and participant in B&H and Adorama Affiliate programmes, we earn a small comission from each purchase made through the affiliate links listed above at no additional cost to you.

