
NLEs are complex. While we may be used to just tapping on any old app on our computer or phone and expect to get good results there is a lot more going on as you video edit.
Depending on your computer configuration, the default settings in DaVinci Resolve 18 may not be the ideal setup for getting the best performance. I’d actually guess that for most people a bit of fine-tuning would speed things up.
One trick is to use an external SSD for some of Resolve’s operations. If you want to learn how you can do this and where you’ll see the benefits we turn to trusted resource Alex Jordan from Learn Color Grading.
The Basics
One thing that many people have learned that will make editing faster is to make use of the cache. This does work very well. Unfortunately, since caching works by creating and saving new files on your computer many people ran into issues with storage as they worked on bigger or longer projects.
The other issue is that if you work on multiple computers or want to bring the project elsewhere the cached files will remain only on your original computer.
If you can’t afford to just go out and buy a bigger, better PC, this is when an external SSD can save the day. And, we are luckily in a world where bigger, faster SSDs are now much more affordable.
Image Credit: Samsung
Before we get into the new method, let’s talk about the old method and how it works to speed up playback. Basically, with caching on, Resolve will make a new version of your files as you edit. This is similar to proxies as it is making a file that is easier on your computer.
The key difference is that caching will actually work after effects are applied so you can get easier playback even with plenty of effects on a clip – something that even some proxies will struggle with.
You won’t even need to worry about quality since Resolve will revert back to your original quality files when it comes time to export.
The Settings
To find these settings you’ll need to head into the Project Settings. It’s on the first page under Master Settings. There is a section labeled Optimized Media and Render Cache. You’ll see some options on what type of file should be made when it creates proxies and cached files.
If you want to make things the easiest for your computer you can set this to ProRes 422 Proxy instead of the default of 422 HQ. The proxy files are also way smaller.
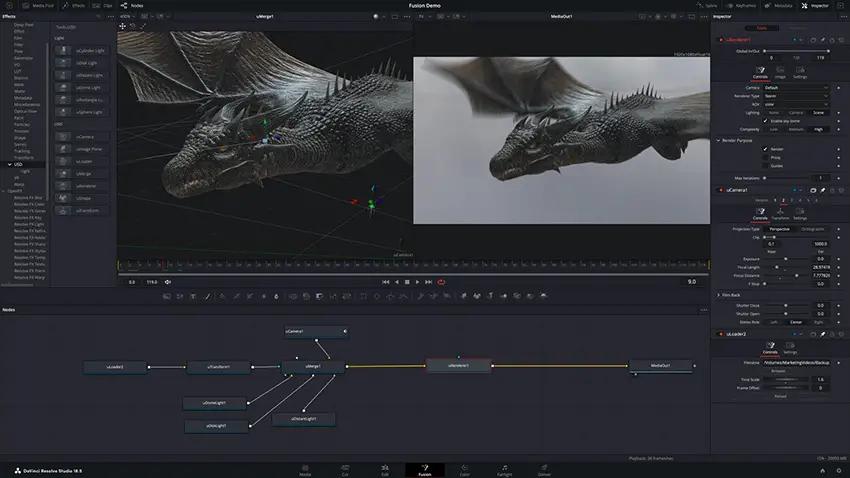
Image Credit: Blackmagic Design
The next section is Working Files. This is where you tell Resolve where to save the render media. This is where you can tell Resolve to save these files to your external SSD.
A good thing to know is that by configuring Resolve in this way you don’t need to worry about not having the drive plugged in. If you are in a place or moment where the cache external SSD isn’t plugged in the system will still function just fine—it just might be a bit slow.
Using the Cache
Once you are all set up you are ready to start taking advantage of caching in your editing. To start, you’ll want some more control over the renders and to do that you’ll head to Playback > Render Cache and then select User. This means you’ll be able to use it as you need.
Right-click any clips that you want to play back smoother and choose Render Cache Color Output and after a little bit you’ll get smooth playback. A blue bar will indicate that Resolve has finished rendering it out.
You can go check out the actual files if you want to go examine them later. Just head to the folder you created on the external drive.

Image Credit: Blackmagic Design
This helps by keeping your main internal storage clean and won’t fill it up over time. The other benefit is that it offloads some work from your main drive. Even some faster drives might benefit if they aren’t being asked to do multiple tasks at the same time.
The settings are changed in this example only at the project level. You might want to go and set this as an overall setting that will be the default for all future projects. The Resolve’s Preferences menu under Media Storage you can remove other locations and then add the SSD as your media storage.
If you do this and you don’t have the SSD plugged in it will cause an error for Resolve.
Are you a fan of caching and have you ever tried setting up Resolve in this way?
[source: Learn Color Grading]
Order Links:
Disclaimer: As an Amazon Associate partner and participant in B&H and Adorama Affiliate programmes, we earn a small comission from each purchase made through the affiliate links listed above at no additional cost to you.
Claim your copy of DAVINCI RESOLVE - SIMPLIFIED COURSE. Get Instant Access!


