As filmmakers we can always tell the difference between the “anamorphic look” and the one achieved with commonly used spherical lenses. The aberrations such as the long horizontal lens flares, oval bokeh, highly curved corners, “breathing” of the lens all typical for the look of some of the biggest hollywood blockbusters, like Jaws, Raiders of the Lost Ark, Blade Runner, Pulp Fiction, Alien and many others, is so recognisable and unique that it can’t be easily missed.
Unfortunately, anamorphic lenses are still out of reach for many low-budget filmmakers and recreating the anamorphic look could be a quite an overwhelming task as well. Yet, US-based film editor and filmmaker Vashi Nedomansky succeeded in developing his own Anamorphic After Effects workflow that helps replicate the Anamorphic aesthetics without resorting to the use of anamorphic projector lenses, adapters and tricky diopters. You can download the latest free update of the Vashi’s After Effects Plug-in Project here.
VashiMorphic40 – Free Anamorphic Effect from Vashi Nedomansky on Vimeo.
The plugins used in this project are included in After Effects or can be downloaded for free. Vashi has focused on matching the curvature and look of the 40mm Panavision Primo Anamorphic lens in particular.
You can easily achieve this look with any Full Frame camera that captures 16:9 footage with focal lengths between 28mm to 35mm. For APS-C sensors, one can get similar results using a 20mm or 24mm lens and 10mm or 12mm for the BMCC 2.5K sensor respectively. If you are using zoom lenses, the one that definitely will do the jod is the Canon EF 24-70mm f/2.8L as it provides both 28 mm and 35 mm lengths.
Vashi uses mainly three effects to replicate the look. These are the Bezier Warp, CI Vignette and Blurred Corners effects. Only the right combination of the settings of these three plug-ins along with the 16:9 footage can give you the desired results and the feeling that your footage is actually shot with an anamorphic lens. The other important aspect of the process is to frame your shots as if you are shooting in 2.39 aspect ratio. Just mark your screen or turn on 2.35 overlays on your monitor so that everything you want in the shot goes within the 2.35 frame.
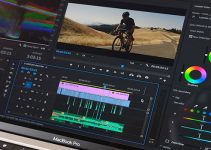
The workflow in After Effects is quite straightforward as well. Just import your 16:9 footage into the “Your Footage” layer. Adjust CI Vignette and Corner Blur settings to taste and render out the composition as you would do with any other AE project. VashiMorphic will not replicate lens flares, but you can easily add some from the Free Rampant Library that we had already covered some time ago.
This unique workflow will make possible simulating of the highly demanded anamorphic look and aesthetics by using a regular DSLR or other 16:9 footage. If you want to get more details and in-depth information on how exactly Vashi managed to pull this off you can check out his extensive post on the topic here.
[via Vashi Visuals]
Disclaimer: As an Amazon Associate partner and participant in B&H and Adorama Affiliate programmes, we earn a small comission from each purchase made through the affiliate links listed above at no additional cost to you.


