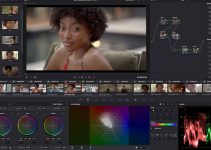
When it comes to editing inside of DaVinci Resolve, a lot of computer power is required to get a smooth editing experience. Even though having a fast editing machine is important, beginner filmmakers may not have the luxury of editing on pro-level workstations or laptops. In fact, some novice editors may be stuck with machines built before 2016.
While this may be the case for some, having an old computer doesn’t mean it’s impossible to have a workable experience while editing. In fact, if you’re using such a system, there are a couple of steps you can take to vastly improve your playback performance. Seasoned colorist Alex Jordan of Learn Color Grading has a few useful tips on the topic.
The first step in improving your Resolve playback performance is to change the optimized media and render cache settings. To do this, go to your Settings panel. Under the Master Settings Tab, look for the section labeled Optimized Media and Render Cache.
If you are a Windows user, change both to DNxHR SQ. If you’re using an older Mac, you’ll need to use ProRes 422 LT.
Afterward, look below the Render Cache dropdown menu and ensure that the checkbox “Enable background caching after ___ second” is ticked. Also, change the time interval to 1 second. Once you’ve made all the adjustments, click OK.
Next, under the Playback menu, make sure “Use optimized media if available” is enabled. In the same menu, change the Render Cache setting from “None” to “User”.
As explained, these three steps will prepare Resolve to optimize your footage. However, this does not tell the software to actually begin optimizing your clips. You should do this manually by right clicking on a file and choosing “Generate Optimized Media.”
Once you’ve done so, you’ll have to wait for the NLE to render the optimized media. After the process is complete, you will find your scrubbing and playback experience to be much smoother with little to no dropped frames.
Despite you might have your optimized media, you will notice that as you start adding video effects and color nodes, your timeline will once again slow down. This happens on all machines – old or new. To fix this, right click on your clip and select “Render Cache Color Output”.
When you choose this option, a red bar will appear on top of your video that will slowly change to blue. Once the entire bar becomes blue, you’ll be able to add as many effects and image adjustments as you like without affecting playback performance.
It’s important to note that this five-step process is extremely effective – even to the point of making the editing experience on an old laptop a seamless one. In fact, for the whole tutorial, Alex is using a 2013 Sony VAIO laptop equipped with a 2.9GHz Intel Core i7-3520M processor, GeForce GTX640M LE 1GB GPU, and 12GB of RAM.
As old as the machine may be, there are always steps you can take as an editor to ensure that your editing software is optimized for your system. Meanwhile, if you find these tips helpful and want to get deeper into editing and color grading with DaVinci Resolve 16, make sure to check out Alex Jordan’s free courses as well as his special 4th of July Course Bundle that is currently on sale.
[source: Learn Color Grading]
Disclaimer: As an Amazon Associate partner and participant in B&H and Adorama Affiliate programmes, we earn a small comission from each purchase made through the affiliate links listed above at no additional cost to you.


