
As Adobe has tended to do lately, they have been dropping some notable changes for Premiere Pro CC in their Beta version. They have made some significant changes to the import/export experience.
If you want to check it out yourself the beta is available to everyone via the Creative Cloud app. Worth checking out but definitely don’t do it mid project.
For a closer look at the new workflow changes, Javier Mercedes does a deep dive of everything, and it does sound like he is excited about it. It’s certainly a bit technical, but it might be helpful to check it out and see if this is something you want to take advantage of in your next project.
Among the first places, you’ll see the changes are when you create a new project. Immediately, you’ll find a file navigator where you can find and scrub through clips in folders on your computer.
It’s a lot faster to just start a project and get editing after selecting some key clips you need. It replaces the much less fun and a lot more difficult for newcomers menu choices about the technical settings of your project.
A nice touch is that you can select media from multiple folders at the same time. It’ll show up in a little filmstrip on the bottom so you can keep tracking as you go. You can also just make a sequence and change the project name on this page.
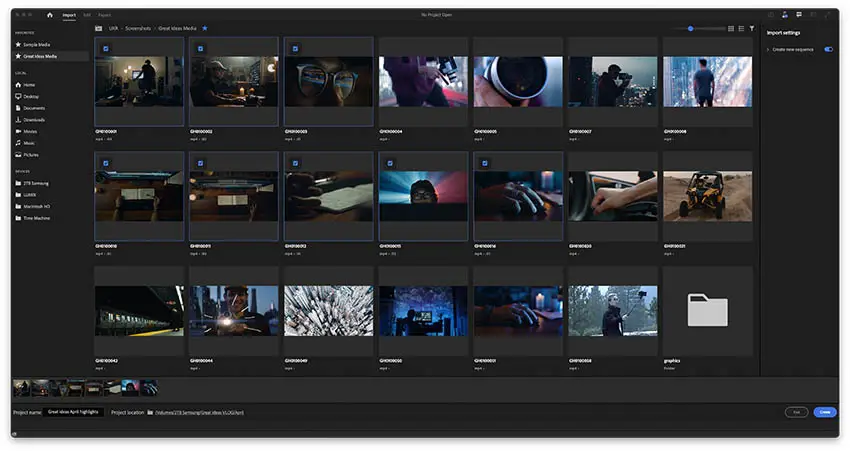
Image Credit: Adobe
Interestingly, it just chooses the sequence settings already based on the footage you imported. The logic behind this decision is a little opaque at the moment and you will likely want to check your settings anyway.
One issue is that you can’t select sequence templates and use them in the new import/create project setup. If you could, Javier said he would probably start using this, but without that, he likely won’t do so just yet.
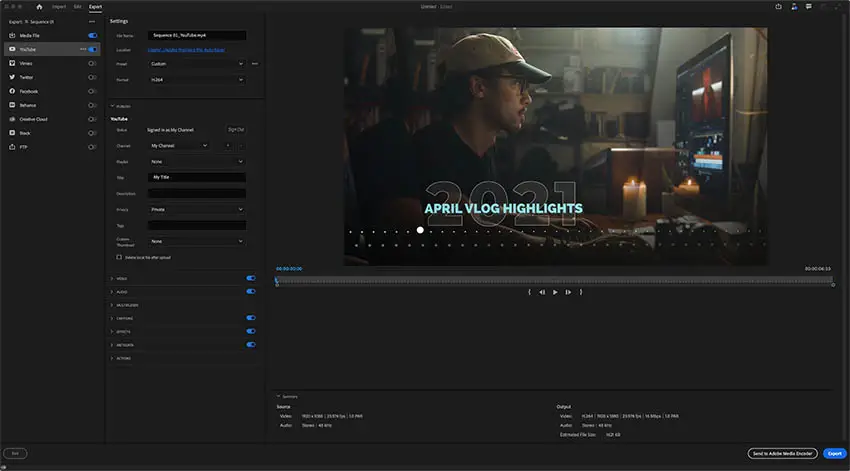
Image Credit: Adobe
The general editing bar does have some of its own changes as well. A big one is the top work bar has been condensed with some options becoming icons with a dropdown. There is also a nice fullscreen video output button so you can tap that instead of using shortcut keys.
Finally, let’s look at the new Export workspace. It’s fairly different and provides a lot more of a top-level overview with the option to enter sub-menus as you need. Meaning, if you are new and just wanted to get a quick export out for YouTube you can do that with minimal effort. If you end up need a lot more detailed specs then you can dive in as you need.
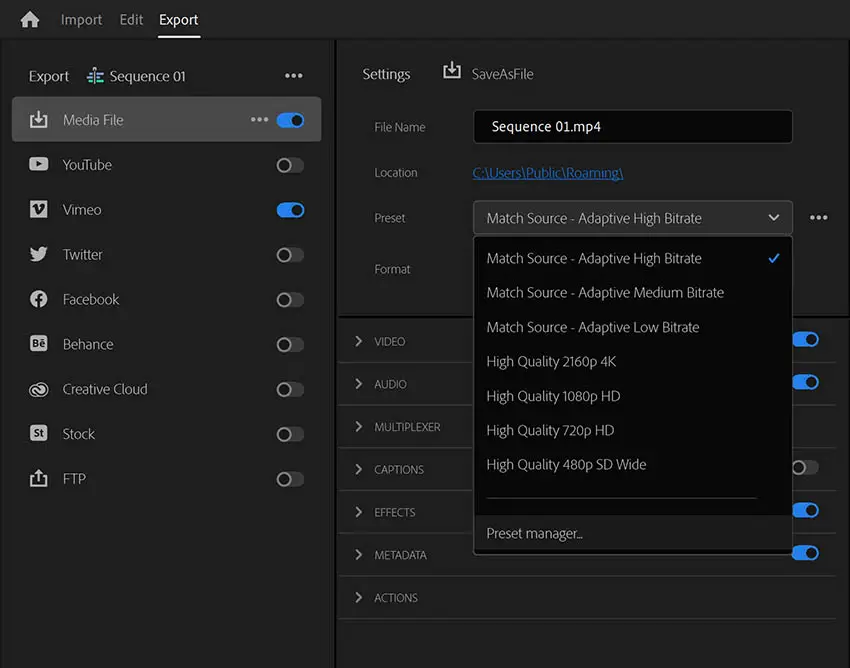
Image Credit: Adobe
Before, it was a fairly long list where things were very hard to find. The basics are there by default and you can then choose to access the main list when you know what you are looking for. You can also favorite some presets to surface them in your condensed menu. That’s a nice quality of life upgrade.
You can also make use of a streamlined process for exporting directly to YouTube or other channels. It still needs to be tested for stability but could be nice.
And, a nice thing is that they are working on adding background exports in Premiere Pro directly. Before you would have to head over to Media Encoder to do it. Having it built-in is very nice.
Any features here stand out to you?
[source: Javier Mercedes]
Disclaimer: As an Amazon Associate partner and participant in B&H and Adorama Affiliate programmes, we earn a small comission from each purchase made through the affiliate links listed above at no additional cost to you.


