
Grading log footage isn’t always so much fun. Think about how many camera manufacturers are spending resources to develop picture profiles that don’t need any grading, like Sony and their S-Cinetone, so that filmmakers can just go out shoot and then deliver a gorgeous image. Log is still the best if you want maximum flexibility and dynamic range.
If you are going with log you will want to have a solid, efficient workflow to go from flat to contrasty and saturated. If you are looking for a place to start, Alex Jordan of Learn Color Grading is one of the best educators on grading and has a five-step process for grading log in Resolve 17.
Alex says right up front that there are a million and one ways to color grade log footage – and that’s an understatement. The problem is that most of them require time and experience to get right. With some log footage ready to go in Resolve we can dive into this tutorial on how to grade in just a few easy steps.
Getting things set up properly is half the battle with your NLE. Make sure the RGB curves panel is open with the histogram visible and set to input. Using the “…” menu in the top right of the tool you can find Histograms > Input.
Next, you want to make sure the YRGB curves are linked. There is a little icon to be activated. This ensures changes are applied across all the channels. Now you are ready.
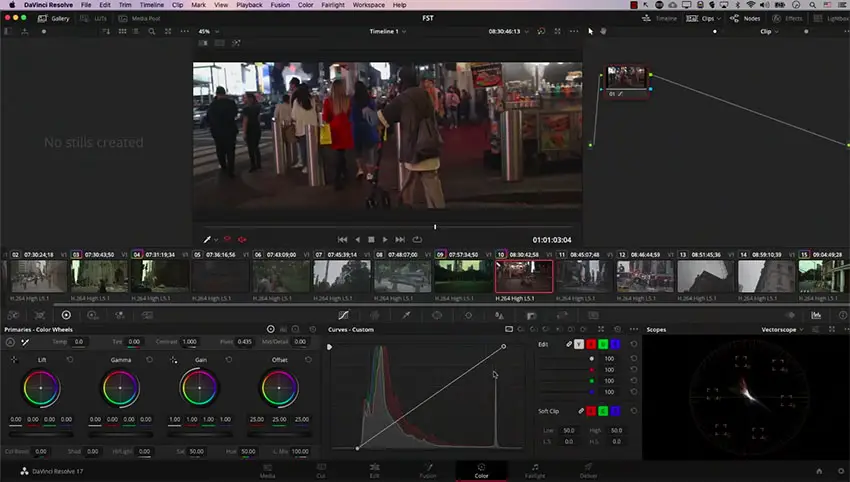
Image Credit: Learn Color Grading
Drag the bottom point on the curve to the edge of the histogram and take the top point and drag it to the other edge of the histogram. This adds contrast to the scene without losing detail.
If you now want to brighten the shadows you will want to add a new point to the curve closer to the bottom. Click to add the point and drag it up until it looks how you want.
What you will want to do now is create a new serial node. You might see the histogram gets stretched out since this node is only looking at the edited node before it.
In this node, you will want to pull the gamma curve slightly to the left. It imparts a “filmic” look. And then you can use the Gain controls to add some style to the image, say adding some green for a bit of color contrast.
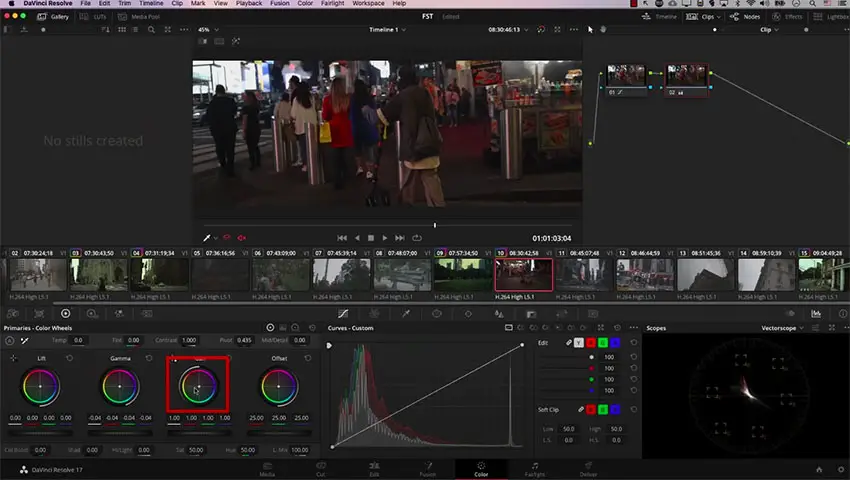
Image Credit: Learn Color Grading
This works well because of how lift, gamma, and gain are mapped. One thing you will need to watch out for is if the scene changes. You will want to work on a frame that is representative of the entire shot, otherwise, you may risk losing information and detail.
Seeing this method applied to other clips shows how it is still a very fast way to work with Log. Meanwhile, if you find this tutorial helpful, you should also check out Alex Jordan’s Holiday Course Bundle which is currently on sale.
Do you have any tricks for speed grading?
[source: Learn Color Grading]
Order Links:
Disclaimer: As an Amazon Associate partner and participant in B&H and Adorama Affiliate programmes, we earn a small comission from each purchase made through the affiliate links listed above at no additional cost to you.


