
Usually the best way to minimize noise in your footage is to make sure you are setting up your shots properly before you hit record. This means using lower or native ISO settings and making sure the scene is lit well.
Unfortunately, this isn’t always a guarantee and either through necessity or accident you might return to your computer to find some shots with a problematic amount of noise.
This noise problem is usually more evident when shooting in log gammas, such as S-Log3. If you want to learn how to fix noisy footage on cameras like the Sony a7 IV or a7S III then you should check out this video from Matt WhoisMatt Johnson.
If you are finding that your S-Log3 footage is looking noisy after grading then you need to adjust your exposure methods during shooting. You need to make sure things are bright enough. Regular metering isn’t ideal for the profile, ideally you would actually “over” expose it by 1 to 2 stops. This should give you much cleaner footage.
Getting it right in camera is the best, but accidents happen and sometimes you need to fix it in post.
One way to fix this is to be careful with how you grade your footage. Most of the noise is in the shadows of your clip. If you are pulling up the shadows it will make the footage look a lot worse. You should try to focus on bringing up the highlights and midtones while keeping the shadows lower.
Using the curves tool you can carefully bring up the highlights and midtones on the curve and make more precise tweaks to the shadows. The footage will likely have a bit more contrast but it will look better since the noise isn’t being pulled out. Not ideal but it will work.
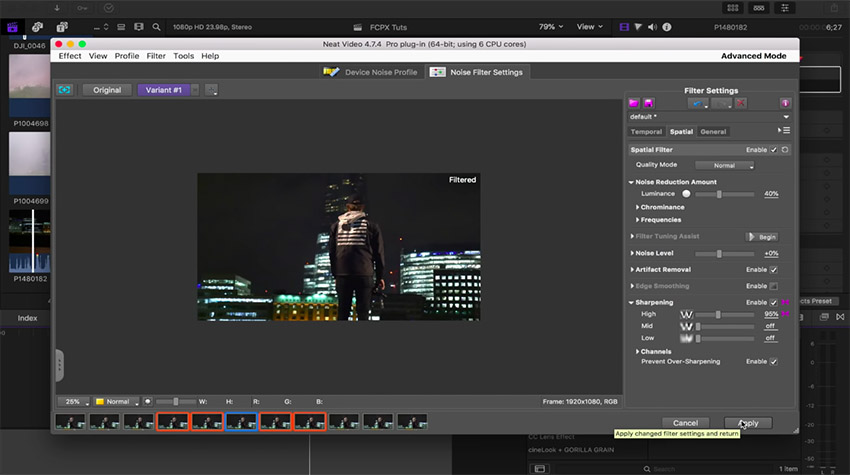
If you do need to get rid of the noise then you will need to apply some noise reduction. There are some built-in tools with your NLE, but the recommendation is to go with a paid option: Neat Video. The Pro version costs about $130 and is available for most modern NLEs.
Neat has been around for years at this point and is very good at what it does. It’ll analyze each clip to build a noise profile. It is incredibly powerful, though you don’t need to learn all the ins and outs. Even the auto profile should do a great job. Though you can make an adjustment to the noise area selected to make things a touch better. Then it’ll just do the job.
If that isn’t enough what you can do is access an advanced mode. This will allow you access a higher-quality mode. This is good but a lot more intense on your computer.
Keep in mind that you will need to save this step until the very end of your editing or it’ll slow down everything. Neat is great and is worth the extra time at the end.
Have you used Neat Video before?
[source: Matt WhoisMatt Johnson]
Order Links:
Disclaimer: As an Amazon Associate partner and participant in B&H and Adorama Affiliate programmes, we earn a small comission from each purchase made through the affiliate links listed above at no additional cost to you.
Claim your copy of DAVINCI RESOLVE - SIMPLIFIED COURSE with 50% off! Get Instant Access!


