
Proxies are thrown around a lot in filmmaking conversations though if you are new to the editing world you might not have had a chance to dip your toes into those waters.
You should learn about them because they can transform a workflow. Proxies are used because they can dramatically improve editing performance, especially when used on under spec computers or with effects-heavy projects.
Getting and using proxies is a process in and of itself. However, if you use Sony cameras you can actually use a built-in function to create them. If you want to learn how to use this workflow you should watch this video from Matt WhoisMatt Johnson.
When you load up your footage into your NLE of choice you may notice that not all of your clips will playback smoothly. This can be for a multitude of reasons, though it usually comes down to not having a powerful enough computer.
It may be too high of a resolution, a particularly tough codec (H.265 comes to mind), or just too many effects or layers.
Proxies address this by usually being lower resolution, more edit-friendly codecs, or both.
You’ll need to learn how to turn on the proxy feature in your camera. Sony has it in the menu of all the latest releases, though the a1, a7 IV, and a7S III are the most likely to benefit thanks to their advanced recording options.
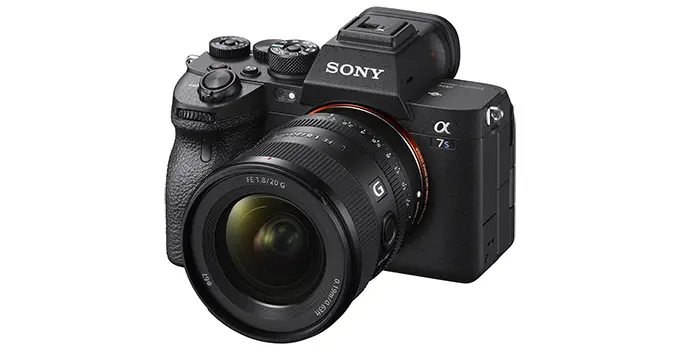
Image Credit: Sony
To enable this feature on the modern Sony menu you will need to head to the red Camera menu, select Proxy Settings, and then turn it on. There are other options as well, such as selecting between XAVC S HD (H.264 at 720p) or XAVC HS HD (H.265 at 1080p).
If you need your proxies to look a little better you can go for the XAVC HS, but most people should stick with XAVC S since it’ll give you the most benefit to speed.
Cameras with the older menu will find Proxy Recording under the Movie menu. There aren’t any customization options with those models.
Something to consider is making sure you have a memory card that is fast enough. As long as you have something that is V60 or better you should be okay. Anything V90 or greater, or going for CFexpress Type A, will guarantee it will work.
One unfortunate limitation is that you cannot record proxies when you are shooting at 120p. For those, you might need to make proxies after the fact using your NLE or ingest software.
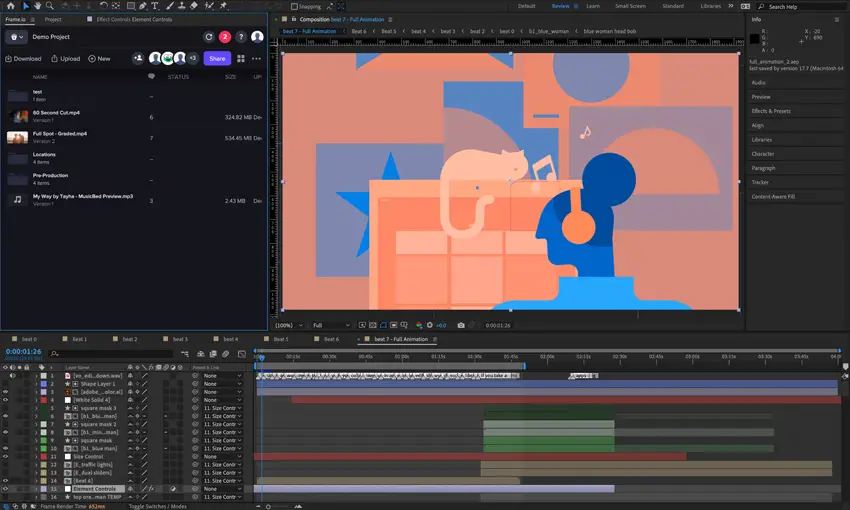
Image Credit: Adobe
With that all turned on you are good to start shooting. After shooting you should have a nice set of files on the card that show both the original media and the proxies. You’ll want to copy the entire folder structure over to your drive for editing.
Working in Premiere Pro you will want to prep your files before you get started. The actual proxies are hidden in the PRIVATE > M4ROOT > SUB folder.
Here you will need to rename the files by deleting the last three characters, “S03” in the example, and then add “_PROXY” in all caps. This is how Premiere handles its proxies and will ensure things work the way they should.
If you have a lot of video clips you probably won’t want to rename them individually. There are a few options for bulk renaming of files though you might want to research finding the one you like best. Matt uses Bulk Rename Utility for Windows and if you are on Mac it has its own built-in way of doing it.
In Premiere, with your original media imported into the project already, you can head to the browser and select all your files. Right-click on the clips, head to proxy, and then attach proxy.
In the dialog box, you will then be able to navigate to find the proxies you have and then it should automatically link all the media with their proxies.
Back to the edit page, you should have a button under the main viewer that allows you to switch back and forth between proxies and original media. When you turn them on you should almost immediately see the improvement in performance.
A note for using proxies is that for things like color grading you should turn the proxies off so you can properly monitor your changes as you make them.
Do you use proxies?
[source: Matt WhoisMatt Johnson]
Order Links:
- Sony a1 Mirrorless Camera (B&H, Amazon)
- Sony a7 IV Mirrorless Camera (B&H, Amazon)
- Sony a7S III Mirrorless Camera (B&H, Amazon)
- Adobe Creative Cloud (B&H, Amazon)
- Adobe Premiere Pro CC (B&H, Amazon)
Disclaimer: As an Amazon Associate partner and participant in B&H and Adorama Affiliate programmes, we earn a small comission from each purchase made through the affiliate links listed above at no additional cost to you.

