
Green screens are the most versatile accessory you can work with during filming. Also known as chroma key technology, green screens can superimpose your subjects against any background. The cinematographer or streamer needs to select the green color to reveal another background via software.
The best part about green screens is that they are time-saving and cost-effective. You wouldn’t have to waste time waiting for the perfect natural background to show up – instead, use the green screen and change the background to whatever you want. In addition, the chroma key technology can help you prevent delays and wind-up photo and stock video shoots faster.
There are many green screen setups you can buy online; each has different advantages and a price to reflect. This article will walk you through five different options commonly used for filmmaking, interviews, streaming, and stock footage.
Low Budget Green Screen Setup
A green screen set up with basic equipment is possible – so if you’re shooting on a tight budget, you can consider this low-budget green screen setup. You’ll need a green screen, a dark room, and enough space for lighting. Ensure the screen is taut, with no wrinkles; we recommend using clamps on stands to tighten the fabric.
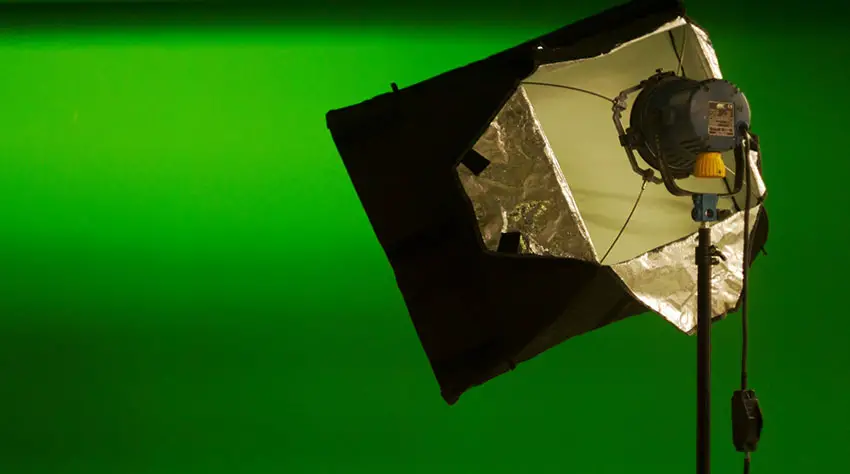
Image Credit: Videvo
Next, you need to create a two-point lighting setup. Have one light set at maximum illumination to act as a key light and the other at 50% – 70% to serve as a fill light. A little experimenting is required before you nail the perfect lighting setup.
Angle the first light evenly on the green screen to avoid hotspots when positioning the lights. Use a lighting modifier such as a softbox to diffuse the beam (or if you are on an extremely tight budget, you can use white sheets).
The second light needs to be positioned on the subject or talent you will be filming. Ensure your subject is far from the green screen to prevent shadows from falling on the green screen. Again, make minor adjustments to the output power of each light until you see a reduction of shadows on the green screen.
Green Screen Setup Using Two Lights
Many photographers and videographers widely use the two-light setup when a green screen is used. This setup requires less time and energy and can be installed with minimum equipment. In this setup, you need to make sure the subject is at a good enough distance from the green screen, preventing green contamination.
On the other hand, the lights need to be at an equal distance from the screen. If the lights are too overwhelming, you can elevate them and tilt them down slightly to get the desired intensity. Again, adjusting the lights til the entire green screen is evenly lit up is essential – a slight alteration can help you get the perfect lighting you desire.
Three-Point Lighting Green Screen Setup
A three-point lighting setup consists of a key light, a fill light, and a backlight. The three lights work together to ensure no unwanted shadows are on the frame.
The key light acts as a spotlight on the subject or talent, the fill light floods the set with even light using a lighting modifier, and the backlight helps define the hairline or edges of your subject. The backlight is very important as it helps gain a crisp edge when using chroma key to mask out the green screen.
Adjust the three lights around the set once your subject is in the frame. The key light should be positioned next to the camera. Position the fill light to the opposite side of the camera (in between the camera and greenscreen – off to the side). The backlight needs to be set at a lower angle, pointing at the subject’s hairline.
Its position is between the subject and the green screen off to one side. Once complete, you need to adjust the intensity of the lights depending on the required illumination. The ultimate aim is to ensure that the subject is well-lit and no shadows are falling on the green screen.
Paper vs Vinyl vs Fabric Green Screen Setup
Green screens come in three varieties. The first is the paper background, which has no texture and creases. Therefore, it can be easily rolled up, stored, and carried around.
Next up, we have the vinyl background, which has a matte effect and is more durable than the paper background. Lastly, the most durable of the lot – is the fabric background. These backdrops are foldable, washable, and super easy to maintain.
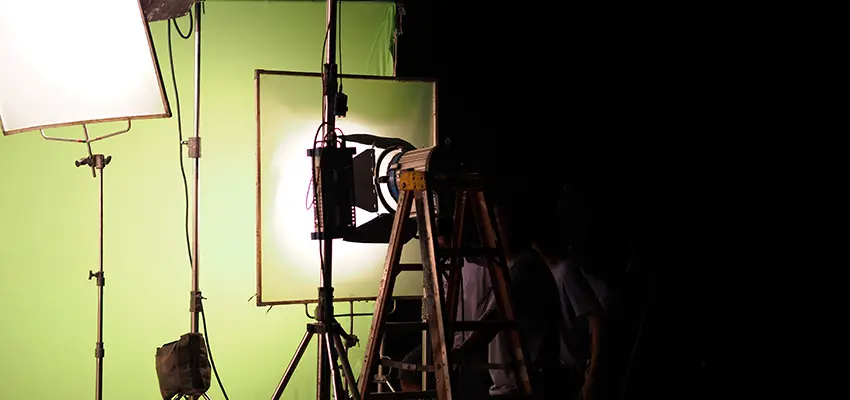
Image Credit: Videvo
Irrespective of the type of green screen you use for your shooting assignments, you need to ensure that the lighting is perfect – just enough to highlight the subject in the frame. In addition, the subject needs to be at a distance from the green screen. If the subject is too close, the green light reflecting off the screen will make it difficult to get a clean chroma key.
A proper lighting setup ensures minimal efforts in the post-processing stage, so selecting the correct green screen and lights that would ideally complement it is advisable.
Streaming Green Screen Setup Using Streamlabs OBS
Green screens are perfect for live streaming as well as a pre-recorded video. Setting up a green screen for a live stream is slightly different, so let’s understand the process.
Once you’ve set up your green screen and lit up the scene evenly, you need to open a powerful free tool from Streamlabs called OBS.
Once you have imported your footage, the software can detect all the green in the background and easily remove and replace it with anything you choose. To mask the green screen, follow these simple steps:
1) Navigate to Sources in OBS and select Filters.
2) After this, click the + sign and choose the Chroma Key option
3) You can adjust several settings within the preview window – from similarity, smoothness, opacity, contrast, gamma, brightness, etc. While adjusting, you will see a preview where you can see every bit of green screen OBS replaces. As more gets replaced, more of the preview window becomes black.
4) Once you’re good to go with the preview, you can continue streaming without worrying about any part of the green screen showing.

Image Credit: Videvo
Summing Up
These simple green screen setups are quick fixes and can help you save time and effort during shoots. We’ve listed a few different setups, so pick the one that best fits your shooting requirements and budget.
Remember, experimenting is vital – you may require some time to understand how the green screen background setups work, but you’ll get better at it.
[source: Videvo]
Disclaimer: As an Amazon Associate partner and participant in B&H and Adorama Affiliate programmes, we earn a small comission from each purchase made through the affiliate links listed above at no additional cost to you.
Claim your copy of DAVINCI RESOLVE - SIMPLIFIED COURSE with 50% off! Get Instant Access!


