
Regardless of the hardware configuration and the processing power, your workstation provides it’s always recommended to optimise it for the software you mostly work with, especially if you are using applications that take a lot of your system resources by default. DaVinci Resolve 12, for instance, provides various options that can significantly help you to optimise its performance, thus enhancing your overall post-production workflow.
The optimisation is also highly recommended when you tend to edit or colour grade more system-intensive or high-resolution formats on slower systems. There are a few aspects that you can improve right off the bat such as playback, default decoding, and caching. The optimisation is an easy and straightforward process that shouldn’t take you more than a few minutes, yet you will find significant improvements in the overall performance of the software immediately.
As with any other NLE, DaVinci Resolve 12 lets you adjust its playback performance which is one of the first settings you should fiddle with. If your system doesn’t handle your media very well at a full resolution you can simply improve it by adjusting the following setting.
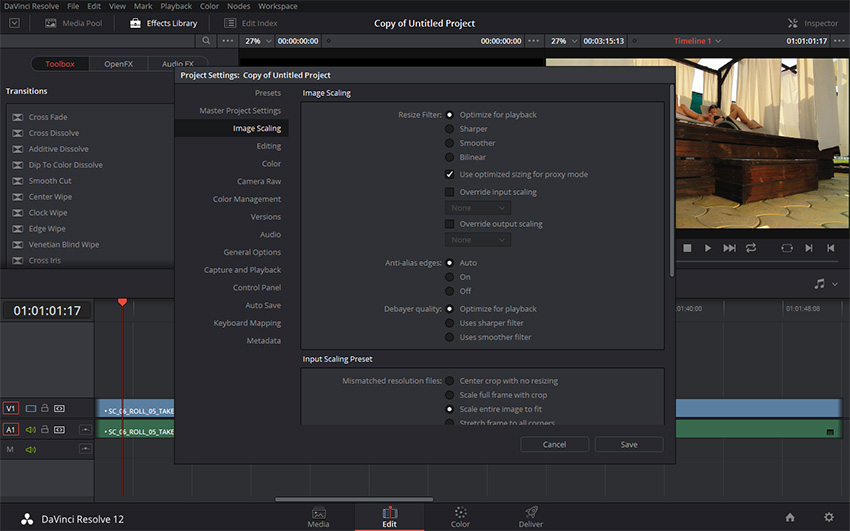
To enter the Project Settings window simply click on the button in the bottom right window of the platform. Select Image Scaling section and under Resize Filter choose Optimise for playback and also make sure that Use optimised sizing for proxy mode is ticked. If you are going to edit or colour grade media that needs debayering in real-time also set the Debayer quality to Optimise for playback.
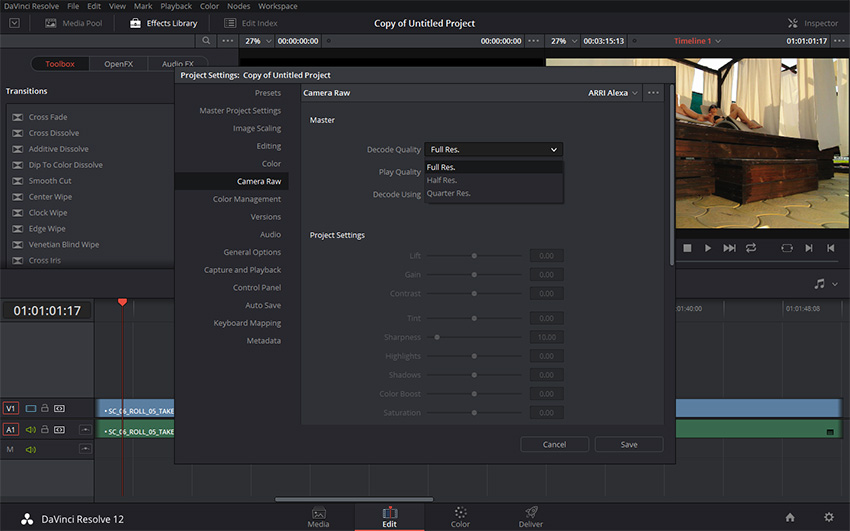
In case you are going to work with any Raw format, you can optimise the playback of these files as well. In the Camera Raw section under Decode Quality and Play Quality you should choose from the three different options available – Full, Half or Quarter Res. Pick the one that best suits your workflow.
In the General Options section, you can also set the default codec that your system utilises by default. As in this particular case, I’m using Resolve 12 installed on a Windows workstation I set this to DNxHR HQ, however, you can select any other intermediate codec of choice that plays back seamlessly on your system. If you are a Mac user, select any of the available flavours of ProRes respectively.

Furthermore, you can improve the playback of your files by optimising Caching as well. To access this setting navigate to Playback>Render Cache and select one of the available options. If you choose Smart the software will render only these parts of the edit, or the Nodes that need to be rendered, thus ensuring that you will get the smoothest playback possible. If you choose User you will have the control over the caching process instead.
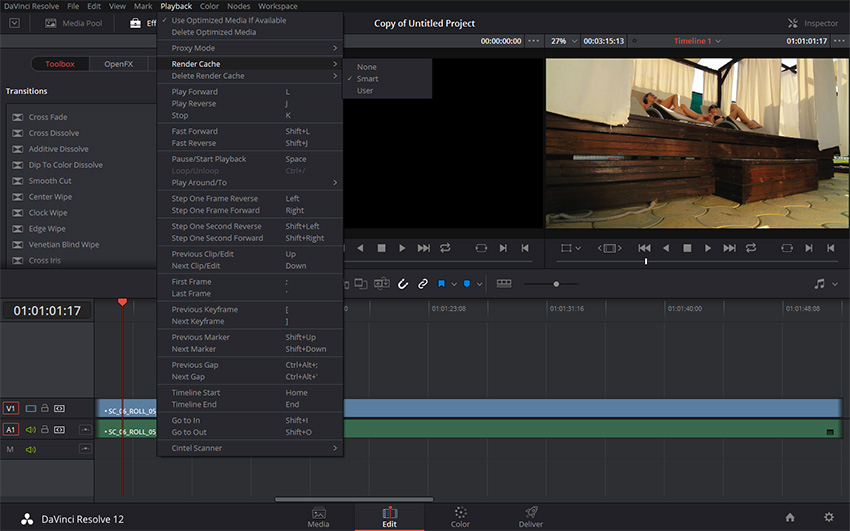
The application will mark all the sections above the clips in the Edit Window, as well as above the nodes in the Color Window that need to be rendered with a red colour.
Once optimised DaVinci Resolve 12 can provide a significantly better performance on your system that will give you a great starting point to continue working on your projects even more effectively and efficiently than before.
[via: Time in Pixels]
Disclaimer: As an Amazon Associate partner and participant in B&H and Adorama Affiliate programmes, we earn a small comission from each purchase made through the affiliate links listed above at no additional cost to you.
Claim your copy of DAVINCI RESOLVE - SIMPLIFIED COURSE with 50% off! Get Instant Access!


