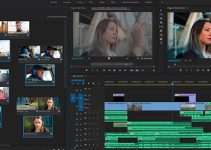
While other NLEs are gaining traction in the filmmaking community like DaVinci Resolve and the reborn Final Cut that has managed to survive all the backslash it got when it jumped to the X version, there is still one particular video editing software that we can consider to be the number one for the majority of indie filmmakers, and that is Premiere Pro CC.
Even though it’s not getting the big pro-market that is still the Land of Avid, Premiere has some great advantages in the awesome integration inside the whole Adobe Suite – a true Swiss knife for any creator, that is if you can live with the subscription model. But let’s cut the chase, B&H Photo Video doesn’t need any introductions, so let’s leave them the floor to illustrate us 10 tips to work faster in Premiere Pro.
#1 – Bin Organizing
It seems our parents were right after all when they asked us to keep our room tidy and clean. A well-organized bin means an easier to access files. That makes finding clips smoother, and overall quicker, it’s simple as that. So, do not throw your videos there, organize them before that, it will all be easier.
#2 – Quick Copy
This trick is easy, but if no one tells you about it, you could go on for years without ever discovering it. Holding down the option key (or the alt key on Windows) while dragging a clip will create an identical copy, just like that. It works like magic.
#3 – Audio Control Points
Some of us love to use the control point on the timeline to adjust audio tracks. You are probably used to select the pen tool, create the editing points, and then go back to work with the normal selection tool.
Well, sure enough, there’s a quicker way to do that, and that is just keeping the command key (alt on Windows) while clicking on the clip. You’ll automatically create an editing point.
#4 – Ripple Delete
This is a feature that real pros use all the time. As many editors say, a real editor does not need the mouse. Anyway, if you want to delete a piece of the timeline without wasting time to close the gap again, you can just use Shift+delete (while holding the Function key in MacOS) and Premiere will delete the selected while moving everything that is at the right back to close the gap.
#5 – Edit Shortcuts
One thing that has got easier in time is the customization of the layout of our keyboards. In Premiere Pro>Keyboard Shortcuts when in MacOS (or under the Edit menu on Windows), you’ll find a tool to edit all the shortcuts to the one of your choice. And that is also a good way to explore those you do not know!
#6 – Track Selection
How many times does it happen that you need to move everything beyond a certain point on your timeline a little bit to the left or to the right? Well, easy enough you just need to use the Track Select tool.
There are three variants here: the plain one, that is enabling the tool by pressing “A” so that everything on the right is selected. The backward one, hold Shift+A and all at the left is selected, and finally single track: hold shift and you’ll grab everything on the right of a certain track.
#7 – Track Locking
When doing some bulky moves, like when using the Track tool, it often happens that you may need to keep some tracks untouched. Well, easy-peasy, you just lock the track by clicking on the lock icon on the left side, so that you don’t have that whole track moving around while you edit.
#8 – Spanning Markers
Many of us are used to markers to keep track of important edit points and such. What many do not know, though, is that you can edit the marker length and use it as a “de facto” timeline note-taking function. Just hit Option+click (ALT+click on Windows) and edit to the desired length.
#9 – Master Clips Effects
Gone are the days when you’d tiresomely go clip by clip pasting and copying grades. Now if you have a single effect to apply to the whole clip, you can simply click on the small “master” tab in effects control, and the work you’re doing will go on the clip itself in the bin, and then cascading in all of the timelines. Be aware only that if you have a grade in the timeline, it will be added to the one you’re doing.
#10 – Match Frame
Ever needed to go back to the master clip from your timeline? Well, all NLEs allow you to recall the original clip in the source monitor while editing quite easily. Just hit “F” while selecting the desired clip in the timeline, and voilà, it will pop-up back in the source. Now you can grab a different portion, scrub through or do what you need to do.
So, there you go, ten easy tips, many of which you probably already know but they can still be very useful and help you speed your workflow inside Premiere Pro CC. But those are not all the ones available. Heading back to the shortcut menu to explore more options is always a good idea.
[source: B&H Photo Video]
Disclaimer: As an Amazon Associate partner and participant in B&H and Adorama Affiliate programmes, we earn a small comission from each purchase made through the affiliate links listed above at no additional cost to you.


