Live-streaming quickly went from a cool, nice-to-have capability for many businesses and creators to an essential aspect of reaching your audience in an extremely short period of time.
It may be unfortunate circumstances that caused this shift, but it is requiring a lot of people learning a lot about how to get the best quality they can for their streams. And to get the best quality it is not as simple as plugging your camera into a computer.
One of the best tech experts on YouTube today is Curtis Judd, and he took a deep dive into his very nice streaming setup. Of course, you could just pick up a webcam or use the one built into your computer.
If that is all you want you probably aren’t going to bother watching this video anyway. This is some serious equipment and not exactly for beginners, though Judd does throw in some tips for beginners.
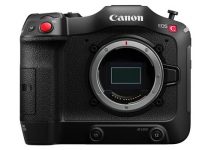
To do live streaming well, you need a camera. Of course. If you have a camera like the Canon C200 Judd is using, that will do an amazing job. Basically any camera with an HDMI or SDI output will do the trick.
They will also be loads better than any webcam. Some camcorders and professional cameras will even offer built-in streaming options for connecting directly to computers too. If you are looking to upgrade your camera that is something to keep an eye on.
The next step in the streaming journey is a capture device (if your camera doesn’t have direct connection capabilities). Judd opts to use the Blackmagic Design ATEM Mini, which functions as both a switcher and capture card.
It takes four HDMI inputs and allows for simple control over the output which is then sent to a computer over USB. Alternatives to the ATEM are simple capture devices – things like the UltraStudio Mini Recorder or AJA U-TAP.
Audio is one of Judd’s specialties, and it is serious on his streams. He uses a Shure SM7B connected to a Sound Devices MixPre, two quite impressive options for audio recording. Dedicated audio recorders have distinct benefits over just going into the camera, usually in terms of quality.
There is a lot more gain before noise creeps in and the limiters are top-notch. Also, a MixAssist feature automatically turns down the gain on audio inputs when people aren’t talking for and even cleaner mix.
For getting audio into your stream, you can do it a few ways. The first is to take advantage of the MixPre’s audio interface mode. Judd’s approach is to send the MixPre’s output to the C200 to ensure that the audio remains synced.
This will be harder since the video will take longer to send out than the audio will and can make it lose sync quite easily.
An affordable alternative is a USB mic, like the Rode NT-USB Mini. You will need to apply an audio offset in your streaming app. Testing this before you go live will be critical.
By recording a test stream with a clap or other visual and audio signal, you can take that into your NLE and find out how many frames it is off by to set your offset. You can also just use a regular headset or another mic that goes directly into your computer if that is all you have.
Single camera/audio solutions are the best for getting started. Once you get into multiple camera and mic territory the amount of equipment will multiple, as will your need for control. Streaming software can handle a good bit, but dedicated switchers and audio interfaces will make things easier.
Streaming software is the final solution as it will take all these various inputs from cameras and audio interfaces and put them all together into a format that all streaming sites like YouTube, Facebook Live, Twitch and others.
One recommended, and free, choice is OBS Studio. Paid for options include streamlabs, vMix, and Ecamm Live, which is a Mac only app that Judd uses. Ecamm is his choice because it is simple and has features like pulling the YouTube chat into the stream as a lower third.
One thing that isn’t absolutely necessary but is super useful is lighting. Judd has a serious setup with a soft light up front to light him and the products, a lamp in the background to add some ambiance, and color lights for a splash of color in the background.
This is a professional setup designed for real cameras, webcams differ in how they expose and want a more even lighting situation to avoid blown highlights and crushed shadows.
Once you actually get streaming working, Judd recommends beginners upgrade one piece at a time instead of going all-in on your setup. You can quickly spend a lot for a serious setup, but if you decide to keep going all the necessary gear will find its way into your kit eventually.
[source: Curtis Judd]
Order Links:
- Canon EOS C200 Cinema Camera (B&H)
- Blackmagic Design ATEM Mini HDMI Livestream Switcher (B&H)
- Blackmagic Design UltraStudio Mini Recorder (B&H)
- AJA U-TAP HDMI Capture Device (B&H)
- AJA U-TAP SDI Capture Device (B&H)
- Shure SM7B Dynamic Microphone (B&H, Amazon)
- Sound Devices MixPre II Series Field Recorder (B&H, Amazon)
- Panasonic Lumix DC-GH5 Mirrorless Camera (B&H, Amazon)
- Panasonic Lumix G Vario 12-35mm f/2.8 II ASPH. POWER O.I.S. Lens (B&H, Amazon)
- Rode NT-USB Mini USB Microphone (B&H, Amazon)
- D&O Lighting 180W Pro Bi-Color LED Panel (Amazon)
- Sennheiser Culture SC 60 USB ML Headset (B&H, Amazon)
Disclaimer: As an Amazon Associate partner and participant in B&H and Adorama Affiliate programmes, we earn a small comission from each purchase made through the affiliate links listed above at no additional cost to you.
Claim your copy of DAVINCI RESOLVE - SIMPLIFIED COURSE. Get Instant Access!


