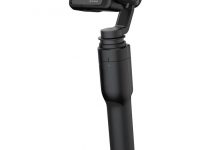
Epic car shots are hallmarks of action-packed big-budget Hollywood films. High-speed chases, fast tracking shots, or even just getting outside a moving car all look great. Nowadays life is easier as you can very easily get a lightweight handheld gimbal, a tiny camera, and hop in the passenger seat of any car.
However, even this isn’t ideal for every type of shot relating to cars. And most of us certainly can’t get a custom-built car with crane and advanced gimbal for our projects.
For those low-angle shots, angles in front of the car, or anything else you can think of Bestboy Adam has a solution for the DJI RS 2. Compared to mounts professional systems use, this setup is only a fraction of the price.
Options available on the market, even newer ones like the Tilta Hydra Alien car mount system, are still expensive and designed for full-blown sets. Also, the Tilta example relies on suction cups, which may not be the most reassuring option for fast-moving cars. If you only need it for one or two shots that is a lot of money to sink into a single product.
Looking at car mount systems, all they really do are add additional suspensions to compensate for the vibrations and shake you naturally get with a moving vehicle. Adam points out this works almost exactly like a Steadicam arm.
So… Adam thought he could take a part of his arm, add some clamps for mounting, and rig up the RS2 as the gimbal to create his own. He can do that for only a couple hundred dollars. Plus, if you need to use both he shows how he can reconfigure everything in a few minutes.
What do you need to do this yourself?
- Steadicam spring arm
- 2 x large clamps
- 4 x small clamps
- 2 x aluminum tubes w/ cross connector
- Damper
- Mounting plate
- Tube clamps
- Battery
For the arm, you’ll want something that can hold a solid weight. Adam recommends at least 5 kg, or 11 lb. You’ll probably want some wiggle room to account for various lenses and accessories you might throw on the camera.
The hardest part is finding adapters to mount your clamps to the end of the arm. Hopefully, your arm has some relatively standard holes for threading together the various parts.
Otherwise, you are going to have to get serious with your DIY skills. Adam ordered a piece of aluminum he could cut down to size and drill holes in to match placement of the holes on the arm. Then added some holes to attach the clamps. It’s simple once you see it.
Clamps are great for universal mounting. Larger 50mm and smaller 30mm should be easy to find and work with most common pipes you’ll see. The aluminum tubes are needed to move the gimbal a little bit farther from the arm to avoid any accidental impacts.
Another set of problems to solve are the vibrations you’ll get from the car’s movements. Adam points out you’ll want a kind of pendulum mount and a damper.
A standard hard mount isn’t ideal because a lot of tension will be applied to the connection and the gimbals motor. A simple gearbox element can provide the right type of motion without freely spinning around. Mount this directly to the plate.
Without resistance, it can allow the gimbal to swing around a bit too much. Adding some springs using an angle bracket will help keep things in place while still permitting enough movement to keep things smooth.
Next up is mounting the RS 2. Removing the battery grip reveals three screw holds—much better than a single point on the base of the grip. You’ll need to pick up the DJI Expansion Base Kit or a Tilta Power Supply Base for RS 2.
The DJI kit is what Adam likes because it comes with a remote control. The Tilta does permit the use of a phone or even other controllers if you go that route.
Power is another issue you’ll need to address. This is going to be down to preference, just make sure it has the proper outputs so you can get everything hooked up.
The damper is going to be used to help calm down the movement of the springs on the Steadicam arm. Working handheld with an arm is okay since you aren’t generally putting such abrupt moves on it.
This requires some handiwork. Putting some mounting holes on the arm’s top and bottom pieces is what you need to do as appropriate for your arm. This helps keep things from snapping around if you hit a dip in the road.
Now you are ready to get setup. Mount the arm on whatever you need to clamp on. Attach the aluminum pipes set at an angle. Add the RS 2 adapter, attach the RS 2, and secure it with the stiffener.
Adam’s car is actually designed to hold this mount with a rig of tubes and clamps holding everything secure. Please keep in mind that this is a serious project and you’ll want to check your mounting a ton to make sure it is safe.
Still, with a little ingenuity and common parts from a hardware store you can create a pro-level car rig. It’s impressive and shows off how good the RS 2 actually can be.
Please make sure you take safety as the number one priority if you want to attempt this. What are your thoughts on this insane car rig?
[source: Bestboy Adam]
Order Links:
Disclaimer: As an Amazon Associate partner and participant in B&H and Adorama Affiliate programmes, we earn a small comission from each purchase made through the affiliate links listed above at no additional cost to you.


