
Auto used to be a dirty word. Autofocus. Auto exposure. Auto anything was bad. Now we have software like DaVinci Resolve that actually promises to do some auto color work.
If you stumbled upon the auto-balance setting and tried it you probably didn’t get anything close to what you wanted and just gave up on it.
I would say give it another chance because while it certainly won’t do the job for you it is definitely a tool worth checking out.
If you don’t believe me, you should listen to Alex Jordan from Learn Color Grading as he has some of the best tutorials and lessons on how to use Resolve and create better grades.
1. Splitter/Combiner Node
Beginners will benefit a lot from using these tools as it can quickly get you to somewhere that is closer to your final result.
The key here is speed. Alex works on an initial clip and hits the auto button. It’s definitely getting there, but the colors are not quite right.
What he does is grab a still to remember the image. He resets the clip and uses a Splitter/Combiner node. This gives more control over the different RGB channels.
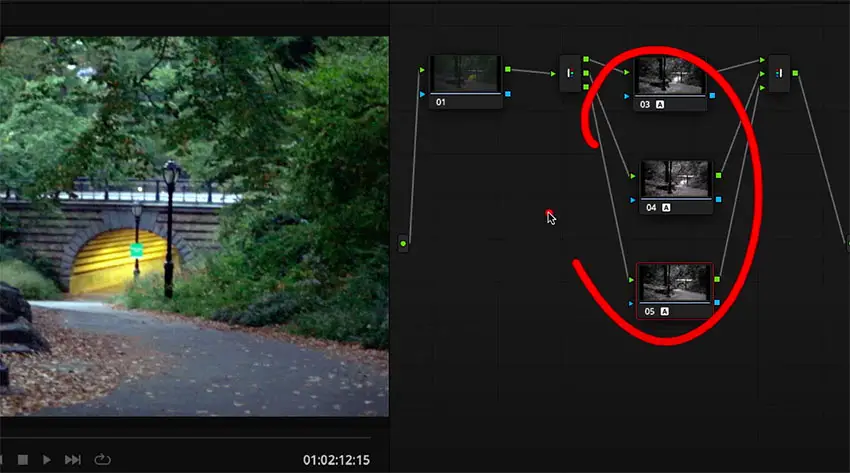
Image Credit: Alex Jordan
He repeats the auto color process but on each channel separately. It actually looks a lot better than the generic auto color. It better manages the saturation of the different channels.
2. Edit Page Auto Color
If you map the auto color button to a shortcut you can use it elsewhere in Resolve, such as the Edit page. You may notice that the auto color tool only works with the information for a single frame. If you have any changes in exposure or color you’ll likely not have something that works for the entire clip.
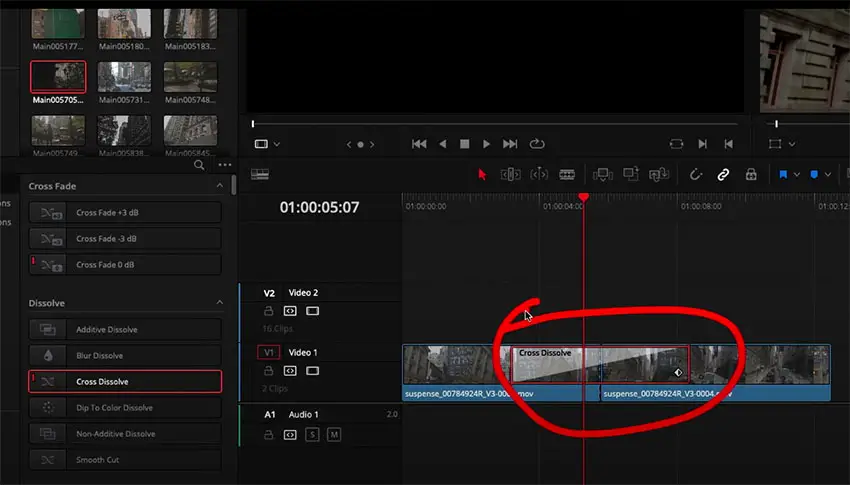
Image Credit: Alex Jordan
What you can do for changes like this is to cut the clip in half. You can then apply different auto-color grades to each part of the clip. The transition will be rough, but it is easy to solve by adding a cross dissolve.
3. Exposure Only
Sometimes the color is well handled by the camera. If you don’t want the color to be changed but still want to automatically balance the exposure you’ll need another trick. Using another clip with an auto color and then grabbing a still he will remember the colors.
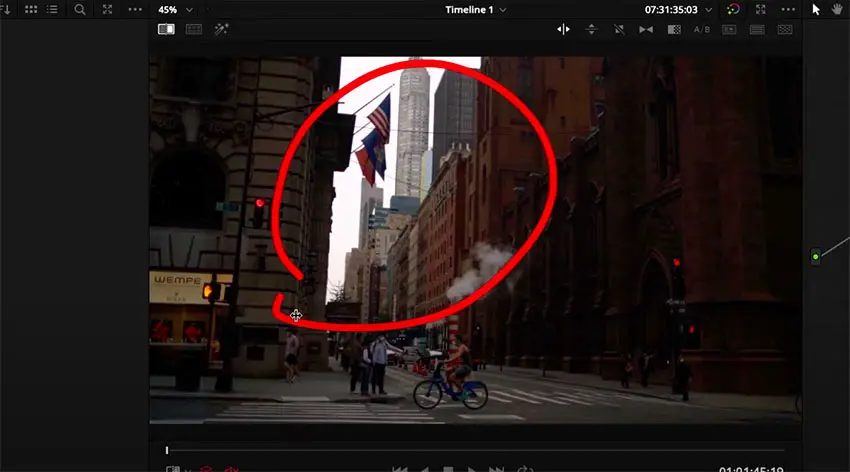
Image Credit: Alex Jordan
Reset it. Now, in the first node he will actually reduce the saturation all the way to get a black and white image. Then you can make a new node, apply an auto color to the second node and then delete the node that desaturates the image.
Since it is only judging a black and white version it’ll only adjust the exposure.
Some good, quick tricks to hopefully speed up your editing and grading.
[source: Learn Color Grading]
Disclaimer: As an Amazon Associate partner and participant in B&H and Adorama Affiliate programmes, we earn a small comission from each purchase made through the affiliate links listed above at no additional cost to you.
Claim your copy of DAVINCI RESOLVE - SIMPLIFIED COURSE with 50% off! Get Instant Access!


