
There are some things that certain NLEs do better than the other. Adobe Premiere Pro has taken over as practically the default these days with capable programs and wide compatibility across cameras and plug-ins.
DaVinci Resolve on the other hand still dominates in the color grading space. In an ideal workflow you want to use the best of both worlds – and it is in fact possible to do so.
If only moving from one NLE to another was easy. XMLs certainly make the process somewhat simple, they just don’t always work perfectly. Coming from expert Darren Mostyn is a well-explained tutorial on how to send a Premiere timeline to Resolve and fix XML issues.
Step one is going to start in Premiere Pro with your timeline. This is a fairly simple timeline with only a couple layers of media to work with. What you need to do is make an xml file. This is a standard file that essentially has all the metadata about which clips you uses and what edits you may have made.
Exporting an xml is easy. Head to File > Export > Final Cut Pro XML. Yes, it is a Final Cut XML. This is a standard file that many programs can read well – including DaVinci Resolve. Save this file.
Heading back over to DaVinci Resolve you will head over to the Media Pool, right-click, and then Timeline > Import > XML. You will get a dialog box with some options. It’ll tell you the file, the timeline, master timeline start timecode, and more.
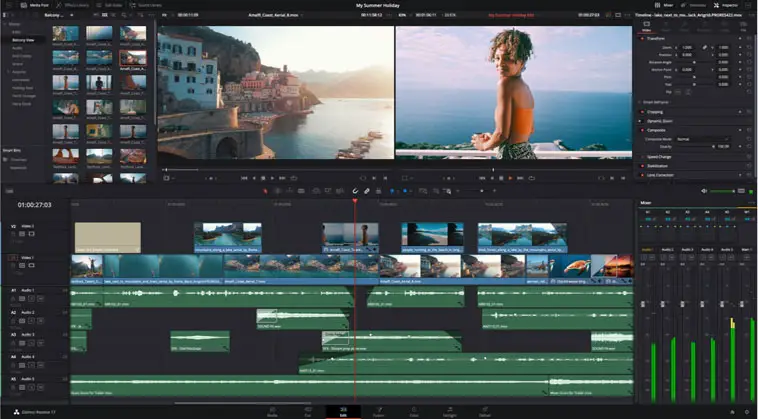
Image Credit: Blackmagic Design
Selecting Automatically set project settings will take care of a lot of the background settings based on the original project. Also have Automatically import source clips into the Media Pool too. And, have it use the sizing information.
At the bottom you can set the timeline resolution if you want to change it and then you can hit okay. It should be looking good now, all your clips should show up with their cuts and positioning in your timeline. If you are a lucky with a simple timeline then you might be done.
In this case, when you get to the Picture-in-Picture edit you will notice that it didn’t actually work. Where things went wrong in a very technical sense has to do with how the NLEs scale the footage. This is an HD timeline, but using UHD footage. Dragging the UHD clip on the Premiere timeline shows that it was set to “Scale to Frame Size” instead of “Set to Frame Size”.
Scale automatically rescales the footage but it doesn’t actually change it in the settings, which explains why the scale setting in the inspector doesn’t show any changes. If you choose “Set to Frame Size” instead it will reflect the true size of the clip in relation to the timeline. Changing the scaling properties in Premiere to reflect this and then exporting the xml will have the xml file retain the proper sizing for Resolve.
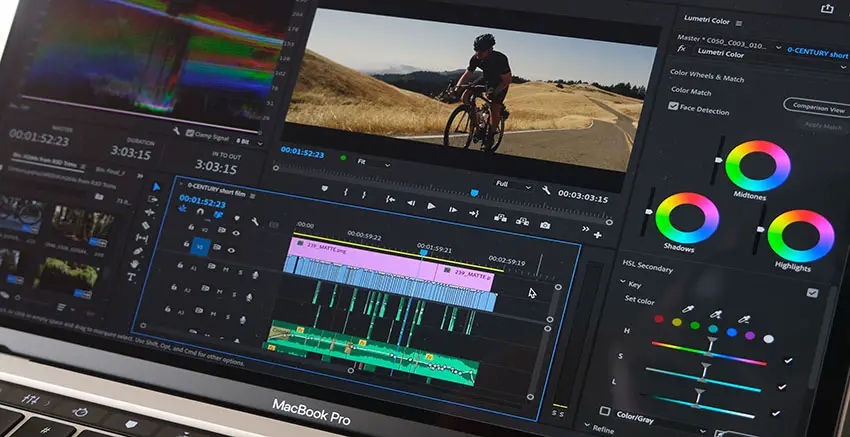
Image Credit: Adobe
Moving back to Resolve, the regular clips were properly scaled because Resolve has a similar setting to automatically scale images with mismatched resolution compared to the timeline.
A more complex timeline may show other issues. Darren has a sample of this that features a dissolve, more layers, a clip that has a reposition and rotation, a moving PiP shot, a lens flare, and more. You will still start the same way and export and xml. In this case you will get a translation report.
Specifically, the lens flare will not be translated to the report. To verify everything is done right you can export a version of the timeline from Premiere to have a reference.
Go back to Resolve and import an xml. Keep the settings all the same as before. For the most part you should see the clips and edits are brought in okay. You will see that the scaling again is messed up.
This is due to Resolve’s Input Scaling being set to scale entire image to fit. Change it to set to crop with no resizing. This will not touch the settings on each clip and should use just the xml information to do sizing.
Image Credit: Blackmagic Design
It looks fairly okay now, but for frame-by-frame verification you should start looking to pull that reference in. Import the file you exported to the Resolve Media Pool. What you can do is take the first viewer window and in the corner there is a dropdown where you can select Offline.
This allows you to pull in any clip into the viewer for side-by-side comparison. It will match the timecode of the timeline, and since it should be the same it should be lined up.
Going through the timeline you can see how it worked and it seems to have worked well. You can also bring in new effects based on other effects that may not have translated into the new Resolve timeline.
Key settings are “Set to Frame Size” in Premiere and “Set to crop with no resizing” in Resolve to make sure things line up well.
If you want to keep editing on Premiere while using Resolve as a finishing tool this is a workflow you will need to understand and master.
[source: Darren Mostyn]
Disclaimer: As an Amazon Associate partner and participant in B&H and Adorama Affiliate programmes, we earn a small comission from each purchase made through the affiliate links listed above at no additional cost to you.

