
Portable monitors are actually incredibly useful on set, especially once you start adding people to your crew or have clients on set with you.
They can also be expensive. Besides going out and buying one you might be able to take a good screen you already have – from an old laptop perhaps – and build your own portable monitor.
Laptops have some solid components in them and often once they get too slow they end up becoming trash that just sits on your desk, in a drawer, or stored away in a closet.
Coming from DIY NAMBARON is a tutorial to help you reclaim that screen and transform it into a portable monitor.
Getting that laptop screen to work will take a few steps, but a little bit of DIY can give you a nice, new monitor for cheap. You can also use it on set as an extra monitoring display or just as an extra monitor for editing.
To start, you’ll have to remove the screen from your old laptop. Be careful here and if you can find any instructions from a company like iFixIt or on YouTube you probably should check that out. Laptops often have flimsy cables or weird construction that you don’t want to accidentally break the monitor when taking it out.
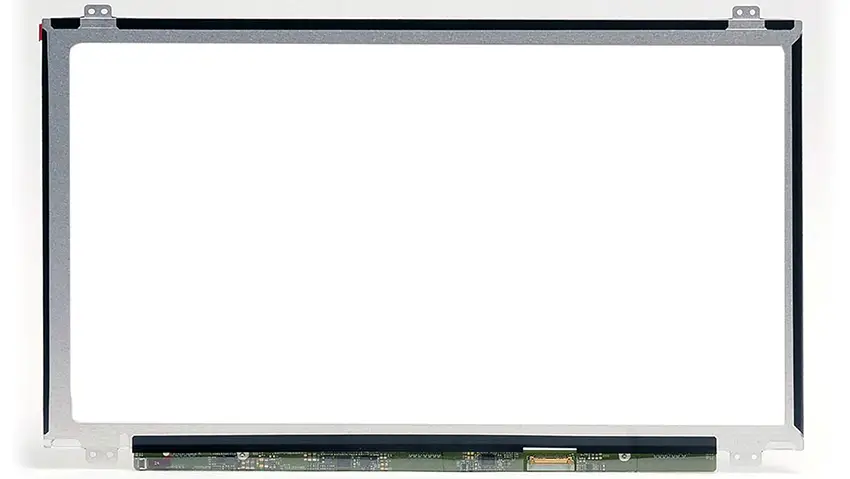
After you have the monitor removed from the laptop you’ll want to find a label on it that gives you the screen’s model number. The 15.6” screen shown in the demo should give you a good idea of what to look for.
You’ll need to check that number and then find the connection that was used for the computer. Figuring out the number of pins for this connector is important.
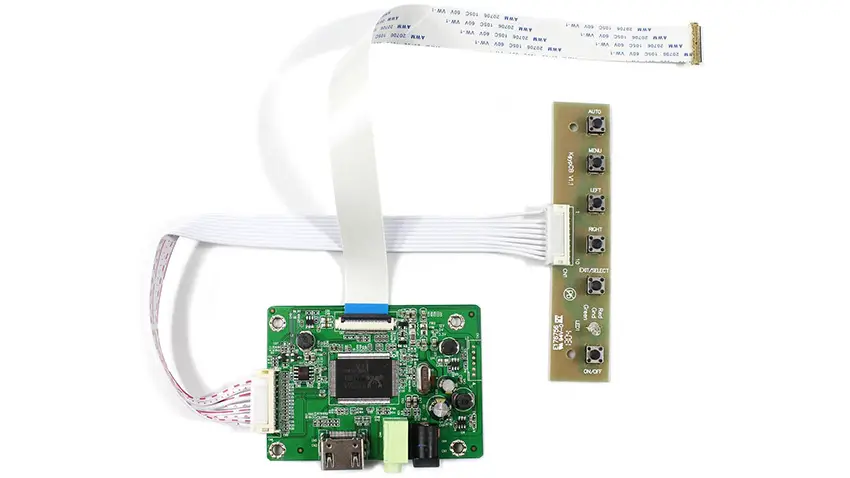
With that information, you can search for an LCD decoder module online (example module). These can be found relatively cheap you’ll just want to make sure you have the screen size, model number, and the number of pins of the connector to get the right one.
Get the cables you might need for this module and the monitor, which might include getting a power adapter and HDMI or DisplayPort cable. All you have to do is hook it up to a computer to test it out. If the module is working then it should just light up light a regular monitor.
Technically this is all you need to do and you have a working, external monitor. If you want to clean it up then you might want to consider building a frame to hold the components nicely and to which you can add a mount.
In the video he shows off how it used a 90mm PVC pipe which was cut, heated, and flattened, to create a nice-looking case. For most of us, I would probably try to find some pre-existing 3D-printed templates for your laptop screen.
You might need to do a bit more DIY to fit things like your particular control and decoding module, but if you have a frame then the rest gets a lot easier. Add some bezels to cover the edges and make it look nice.
This monitor should be fairly lightweight, so while you should still create a secure mounting system you probably don’t need to go super intense with it.
You can also take this opportunity to create the best mounting system for your needs. Add a receptacle for throwing it on a light stand, or just get some Velcro to attach it directly to a wall. The choice is yours.
If you understand the power connector and get the right adapters or cables you can probably power this off a V-mount battery for a completely mobile kit.
This is a nice-looking setup and you can do it on the cheap.
Is this something you might try out in the future?
[source: DIY NAMBARON]
Order Links:
- LCD Decoder Module (Amazon)
Disclaimer: As an Amazon Associate partner and participant in B&H and Adorama Affiliate programmes, we earn a small comission from each purchase made through the affiliate links listed above at no additional cost to you.

