
It’s been said many times on this site – filmmakers cannot forget about audio. Audio can make or break a film and even if you have the best visuals in the world your audience will never get past unlistenable sound. That’s why you need to be looking to learn the ins and outs of audio if you want to be a great filmmaker.
Alex Zarfati is here to help with that. Whether it is learning mic placement, what gear to pick up, how to set it properly, or even what you should do once you hit post production, this video will have some useful advice to help improve audio for video.
Essential Audio Gear
Despite filmmaking not being about the gear, you do need some equipment to get the job done right. It’s not always about spending a lot of money though. Take the time to learn about the different gear you’ll need and why you need it and you’ll be able to make something great even on a budget.
What every filmmaker should invest in is a shotgun mic. These are essential on film sets since they have directional pickup that minimizes background noise even while staying out of frame.
At the entry level, Zarfati always recommends the Sennheiser MKE 600. This is a very affordable and very reliable microphone. Sennheiser is one of the best names in the audio world.

Image Credit: Sennheiser
If you can afford it then you should consider going straight for the Sennheiser MKH 416. This is the industry-standard shotgun mic and though it is pricey at around $1,000 it is a great investment.
There is a second mic that is a standard on film sets and it is the lavalier. These tiny mics are perfect for talking heads and interviews and having a wireless system is the way to go.
Again, Zarfati trusts Sennheiser and goes with their newer EW-DP Wireless Lavalier Mic System. This system has a huge dynamic range that makes it safer to use wirelessly as it minimizes the risk of peaking.
While it is possible to run these mics directly into your camera, the best route to take is getting a dedicated audio recorder. Getting the audio into its own system will give you better controls and better quality.
They also have more inputs if you are working with a few people at a time. You can even record in camera still so that you’ll have two sources with one as a backup in the event something goes wrong.
He uses a Zoom H6 which is a very affordable and well regarded device. It has individual controls for each input so you can get each person set up right. Not all cameras have this level of control and that can make or break your audio.
Mic Placement
Once you have the equipment you need to learn how to use it. Let’s talk about mic placement.
The key for great audio is getting it close to the source. Lavaliers are great for this since you can have them right up on the talent. You’ll want to place these in the middle of the chest and if you want to hide them you can find some sticky tape and attach them to the inside of shirt. Alternate placements with clips make it easy to toss on a lapel or collar.

Image Credit: Sennheiser
Shotgun mics will be heavily dependent on your shooting environment. You’ll want to get it as close as you can—usually without it entering the frame – and then angled towards their mouth/upper chest.
You will need to keep an eye on things or for the best job you should be monitoring with headphones at all times. If the subject moves you’ll need to make sure the mic keeps up.
Setting Proper Levels
To make all of this work you’ll need to set proper levels on your camera and/or audio recorder. This is similar to getting exposure right on your camera. Too high and you’ll get distorted audio and too low and you’ll get noise. You want audio that is able to be worked with in post.
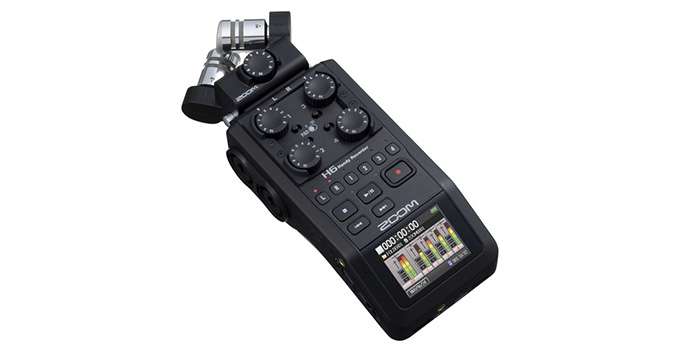
Image Credit: Zoom
You’ll want to account for the fact that people don’t generally speak in a monotone voice. People are dynamic when they talk and so you’ll have to make sure you are in a good range to get a strong enough signal without risk of clipping.
If you are working on your own and not always watching the audio then a safe place to work is to have the audio come in around -12 dB.
Post Production Audio Tips
With all that advice you should have some audio to work with in the edit suite. You’ll need to understand a few tools to make thing sound a bit better. The first step is to use EQ and to do a frequency sweep. Most NLEs should have an EQ of some sort to do this.
Looking at the visual EQ as you are listening you can boost and reduce certain frequencies to see if you can pick up on unwanted sounds or frequencies in your audio. Then you can reduce what might be muddying up your sound.
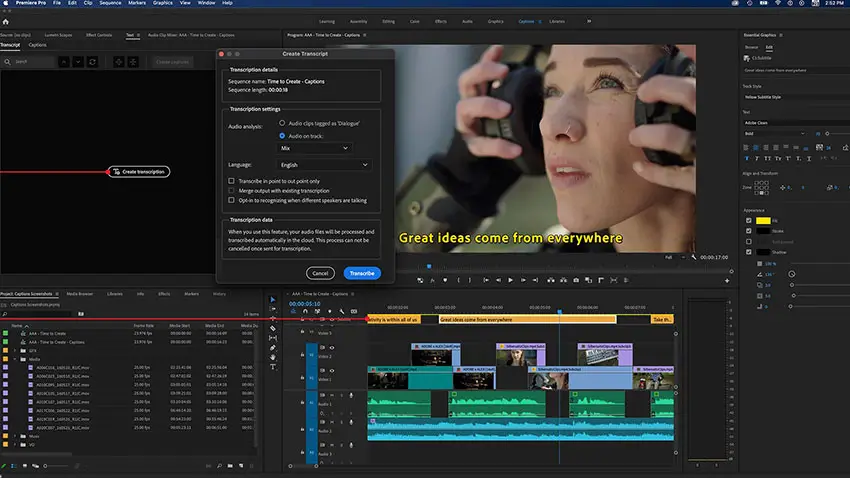
Image Credit: Adobe
As you continue, you’ll likely want to cut the lowest frequencies down dramatically. This low-cut filter will help remove a ton of unwanted sound or noise and is a quick way to make everything sound cleaner.
You will also want to apply a limiter that will prevent loud noises from clipping, which is bad.
You can also try out plenty of new AI tools, like the ones built into the Adobe betas, to try out enhancement tools to take a lot of the work off your shoulders.
Are you ready to take on audio more seriously now?
[source: Alex Zarfati]
Order Links:
- Sennheiser MKE 600 Shotgun Microphone (B&H, Amazon)
- Sennheiser MKH 416 Shotgun Microphone (B&H, Amazon)
- Sennheiser EW-DP ME 2 SET Digital Wireless Lavalier Mic System (B&H, Amazon)
- Zoom H6 Handy Recorder (B&H, Amazon)
Disclaimer: As an Amazon Associate partner and participant in B&H and Adorama Affiliate programmes, we earn a small comission from each purchase made through the affiliate links listed above at no additional cost to you.

