
If you are one of those shooters who have already invested money in buying a GH4, you should know that you don’t have to spend too much more to get a decent rig for your new camera. US-based filmmaker Erik Naso who owns three GH4’s already suggests an excellent DIY rig for the GH4, which he has used in many shooting situations so far.
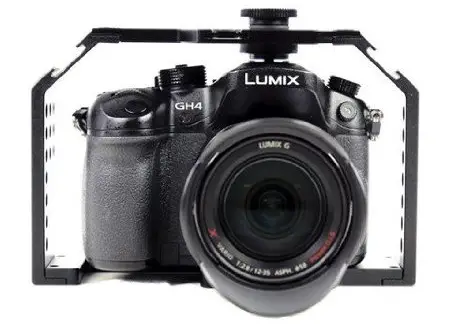
This is how it finally looks. Before revealing the items to build this rig we should say that it looks neat and sturdy. As an option, you can add two 15mm rails at the bottom and follow focus system to control the lens manually. The HDMI cable for the additional monitor is secured, there is a decent mic mount and enough space to add some more bits and pieces depending on the certain needs you have.
The first item you will need is a Fhugen cage. erik Naso previously used this one with his GH3. As we can see it works great with GH4 as well. The cage will cost you around $150.
Instead of using the Micro-HDMI connector he puts an adapter that takes it to Full-HDMI and clamped it in. His advice for us is to use one as well in order to avoid breaking the original port.
The next item you will need is the Wooden Camera Top Plate. It provides numerous 1/4″ and multiple 3/8″ threads on the top and sides for EVF mounts, handles, monitors, and other accessories.

The third item you will need is a Wooden Camera UVF Mount Rail Kit. It enables you to attach and adjust a viewfinder on the rig. A mounting bracket for viewfinders is included. An adapter for using Alphatron viewfinders and SmallHD viewfinders/LCDs comes included as well.
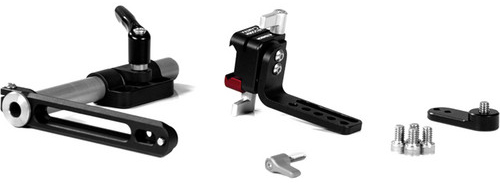
Those are some of the compatible viewfinders one can use: Alphatron, Cineroid, Red, SmallHD, Zacuto and others. Again this is from Erik Naso’s C100 setup and according to him, it works great on this cage since the top plate is attached. He added a Nato rail to the UVF arm because he wanted to be able to swap out the EVF for a monitor. For example, indoors he prefers to use the Ninja Blade and outdoors the one from Zacuto.
One of the last items Erik Naso suggests is the JuicedLink Double-XLR Amplifier.
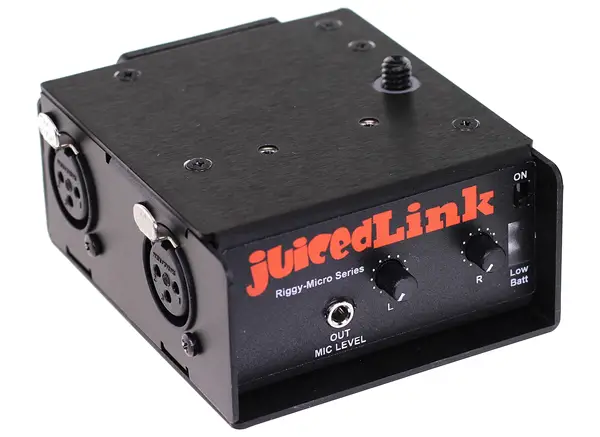
He added this for when he collaborate with a sound guy. The amplifier is set upside down so the cables run out the side. Using a separate sound system with dedicated XLR-inputs is always better solution rather than recording audio in the camera internally. This is a great way not to spend money for the additional module for the GH4.
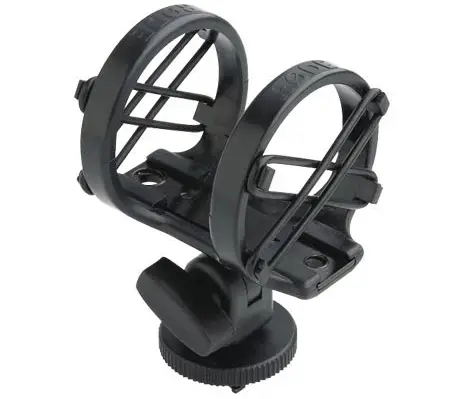
Finally, the last item you will need is the Rode Shock Mount Shoe placed on the top of the rig. There you can mount any Shotgun mic you have at your disposal.
This is not the only one way to build your own rig. In this particular case, Eric Naso uses available items that he already used for his C100 rig. If you need to build your own rig from scratch you could use available bits and pieces that you already own.
Undoubtedly, the dedicated solutions are the best option, however, if you don’t have enough money to invest in new gear, using the one that you already have at your disposal is the better option for you.
[via www.eriknaso.com]
Disclaimer: As an Amazon Associate partner and participant in B&H and Adorama Affiliate programmes, we earn a small comission from each purchase made through the affiliate links listed above at no additional cost to you.


Your source link should point to eriknaso.com (with a K) …. not ericnaso.com
We’ve fixed it already! Thank You!
Regards,